Views: 8
Vivotek Recording Export Video Schedule Backup, Core+ AI firmware take Core+ up a level. Core+ AI NVR’s are empowered with Deep Search, utilizing AI to provide the fastest, smartest and most efficient evidence search user experience. VIVOTEK cameras enabled with Vision Object Analytics provide the metadata used by Deep Search’s AI. Deep Search is comprised of two main functions: Attribute Search and Scene Search.
Is there a function that can allow me to delete the NVR recordings manually?
Question
Is there a function that can allow me to delete the NVR recordings manually?
Answer
There is no specific function the NVR that allows users to manually delete recordings in the NVR. While there isn’t a dedicated command for this function, you can manage your recording storage effectively by setting the number of days the recordings should be kept on the Hard Disk Drive (HDD).
Please follow the next steps to configure the video retention settings for your NVR device.
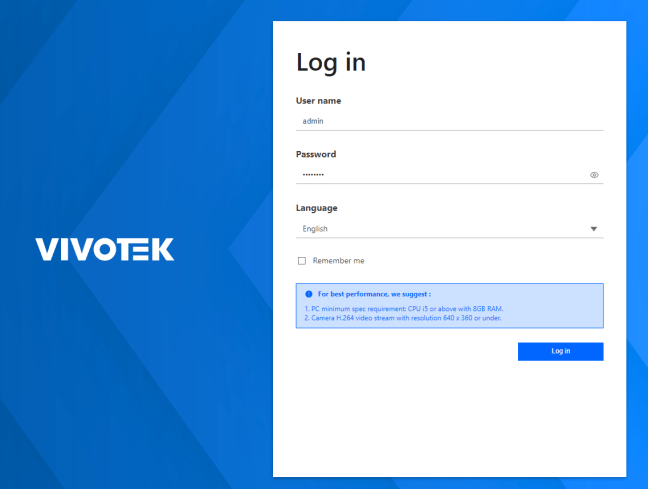
Step 1. Log in to your NVR device’s interface.
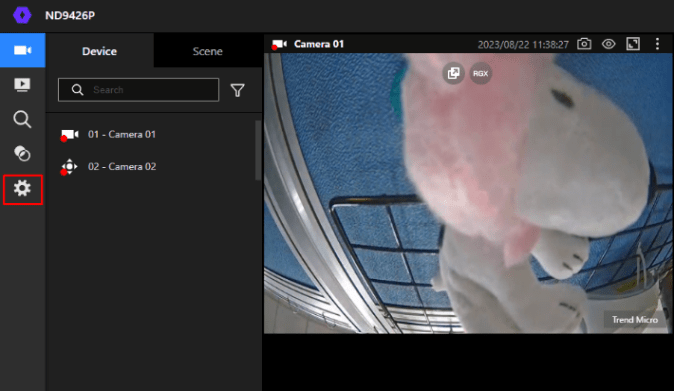
Step 2. Access the NVR configurations by clicking on the gear icon in the web interface.
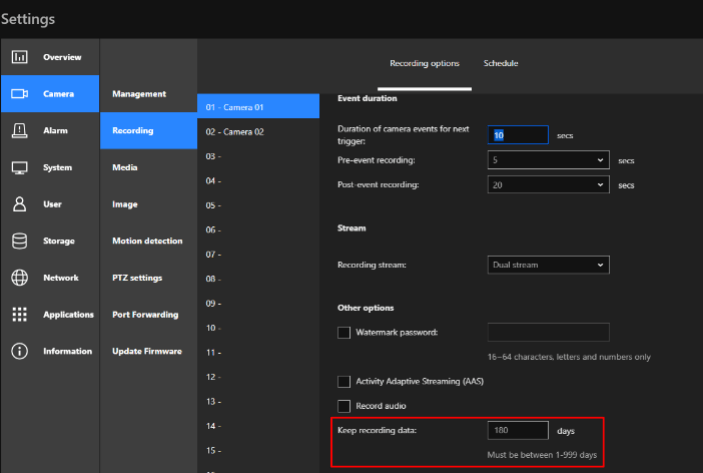
Step 3. In the configuration interface, go to the Camera > Recording section.
Step 4. Select the camera you would like to configure and locate the section titled ‘Keep recording data‘. Here, you can set the number of days you wish to retain the recordings on the HDD of this specific device.
When you modify the retention settings, the system will begin deleting recordings starting from the oldest folder. This means you won’t lose your most recent recordings in the process. If you choose ‘1 day,’ the NVR will wait until one full day is recorded and then it will start deleting. For example, if recordings were performed on Monday, 1/1/2023, the recordings will be deleted on the next day, Tuesday, 2/1/2023.
How to read the old recording disks on new NVR?
Question
How to read the old recording disks on new NVR?
Answer
Please notice that following steps are only for same NVR models:
1. Restore new NVR to default and power it off
2. Export old NVR configuration and power it off*
3. Remove the disks from old NVR and remember their order
4. Insert disks to new NVR with the same order and power it on**
5. Import old NVR configuration to new NVR***
*Our NVR doesn’t support hot swapping, please remember to power it off before remove or insert disks.
**If you operate above steps via local monitor not web browser, please click “Skip setup” to avoid disk being formatted.
***If you import old NVR configuration before inserting disks to new NVR, the disks settings won’t be applied because there is no disk on new NVR.
Vivotek Recording Export Video Schedule Backup
How to keep the recording file after reset the NVR?(from local display user interface)
Question
How to keep previous recording file if I want to reset the NVR? (from web user interface)
Answer

Not showing correct playback interval
DESCRIPTION
When using VAST-playback to playback the recordings in ND8322P/ND8422P, it didn’t show the recordings in 00:00~01:00.
Please see the attached picture “wrong_playback_interval.jpg” for the problem symptom.
ROOT CAUSE
The customer’s time zone settings is GMT+5:30 without daylight saving time.
We found that NVR reply the wrong timezone value(GMT+05:00) to VAST-Playback.
SOLUTION
We released a firmware that can solve this NVR problem. Please upgrade to the latest version on the official website.
Why the used space still shows 0 GB even though there are some recordings in that disk?
QUESTION
Why the used space still shows 0 GB even though there are some recordings in that disk?
As the picture in attachment.
ANSWER
For our NVR, the used disk volume will only shows integer instead of decimal.
So when the used disk volume is smaller than 1 GB, it will show 0 GB.
How to export videos from NVR HDD to a Windows PC
QUESTION
How to export videos from NVR HDD (Linux based) to a Windows PC?
ANSWER
This guide will explain how to export or copy files from the NVR’s HDD (Linux based) to a Windows PC. A ND8322P and Windows 7 PC will be used for this guide. Important note: turn the NVR OFF before extracting the HDD otherwise it could get damaged.
Steps:
Step 1. Connect the HDD to a Windows PC (you can use an external enclosure or connect it directly to the Mother board)
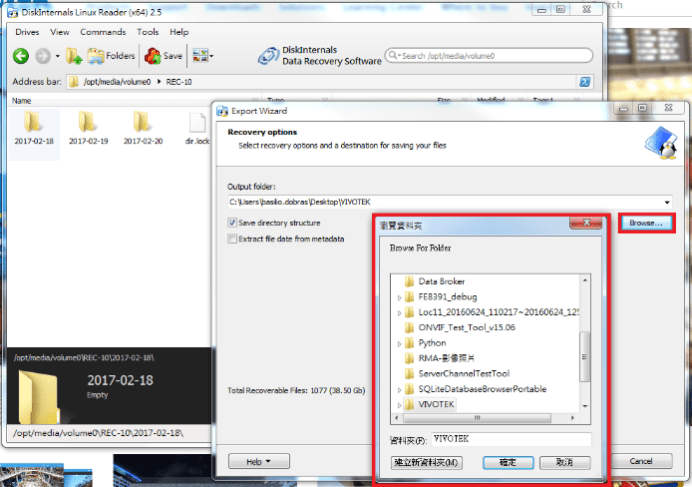
Step 2. Download a Linux reader to read ext4 files contained in the HDD, in this guide we will use Diskinternals Linux reader (Download link: http://www.diskinternals.com/download/Linux_Reader.exe ).
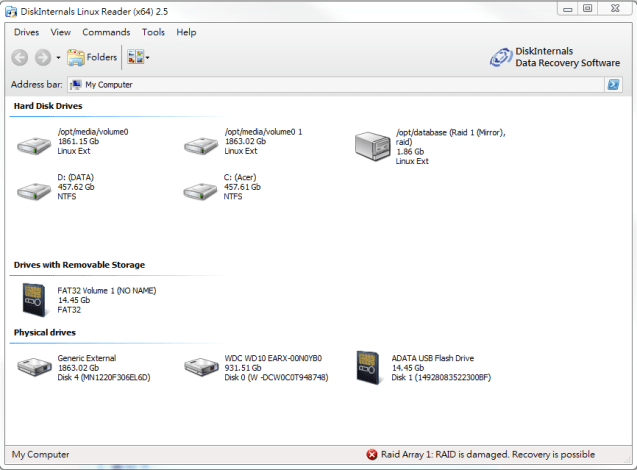
Step 3. After you open the Linux reader, it will automatically read all the drives connected to your PC
Step 4. In the Hard Drive section, you will find two Linux Ext drives, each one of them represents a partition in the NVR HDD.
Step 5. One partition contains the media data in where all the videos are stored (/opt/medi/volume0) and one partition contains database information (/opt/database).
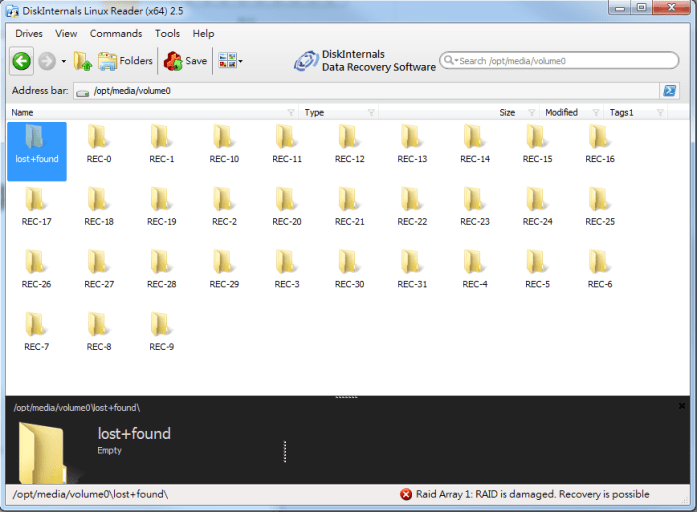
Step 6. After opening the /opt/medi/volume0 partition you will find multiple folders, each one containing the recordings accordingly to the camera numbers (Please see NVR camera number designation).
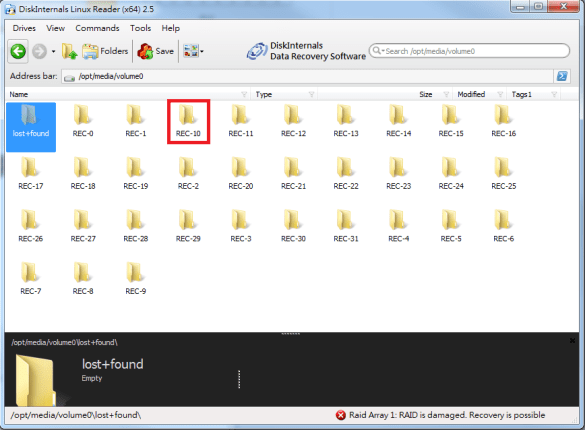
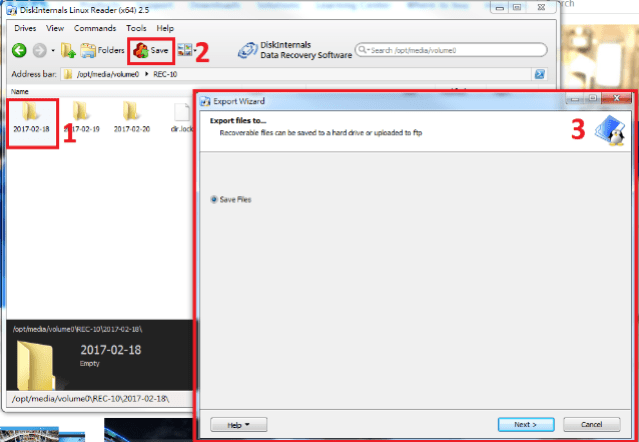
Step 7. For example, If you want to export the recordings of camera 11, open the REC-10 file (Note: Cameras are denominated starting from 0, not 1),
Then select the folder with the recording you are looking and click the “Save” button.
Step 8. Select a folder in where you want to save the recordings, then click the “Next” button.
Step 9. After you select the destination folder, the wizard will show you a list of the documents that are going to be exported.
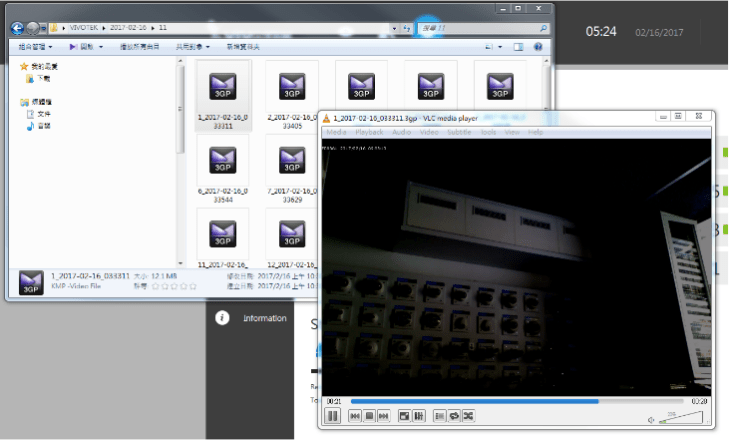
Step 10. When the exporting process if finished, you can go to the destination folder and play the recordings.
Important Notes: If the NVR was configured in RAID 3 or 5 you will need to attach all the disks otherwise the software won’t be able to read the partition.
[Linux-based NVR]I forgot my password for NVR, how to access HDD to obtain recording without password?
QUESTION
[Linux-based NVR]I forgot my password for NVR, how to access HDD to obtain recording without password?
ANSWER
If you were recording with single disk, without doing RAID:
You could directly remove the HDD from NVR to other PC, and read the content with LINUX reader e.g. https://www.diskinternals.com/linux-reader/
How long does it normally takes to sync a HDD to a RAID volume
QUESTION
How long does it normally takes to sync a HDD to a RAID volume?
ANSWER
When installing or configuring the NVR HDD for the first time, you will need to create volumes. These volumes will serve as the area used for recording. When syncing an HDD to a volume, the NVR reformats each data block to conform to the volume’s format. Data blocks are like bricks that make up the volume. Depending on the volume configuration (RAID 0, 1, or 5), the blocks will be assigned differently—some will be divided, while others will be combined.
The syncing process time depends on the size of the HDD used and the time it takes to write each block of data (HDD format).
The NVR’s format at a rate of 20MB/s (block write speed) in order to avoid affecting the NVR functionalities. So, by using the above formula, if you have a HDD of 4TB it will take 27.8 hours to finish syncing.
