Views: 21
Upgrading Hikvision DVR NVR Firmware lease be aware that Hikvision products are region-specific and regionally supported. If you have purchased your Hikvision products from an online source or unauthorized distributor, they may not be compatible with the North American region’s firmware and are considered to be “gray market” product.
Upgrading Hikvision FIRMWARE
Firmware upgrades must be done in ascending order and cannot skip versions.
Upgrading Hikvision DVR/NVR Firmware
To upgrade the firmware of a Hikvision DVR or NVR, please follow the steps below:
- Insert a USB flash drive into the computer’s USB port (Please note that the USB flash drive does not need to be empty; it may contain other files and documents).
- Locate the appropriate firmware by clicking this link
- Click on the firmware, then click download.
- Agree to the license terms and conditions when prompted.
- Locate the downloaded firmware file (this typically will be in the default download folder, unless prompted for a download location, then choose Desktop) and extract it by right-clicking on the file and selecting extract all or unzip. When prompted for an extract location, choose the USB flash drive (typically labeled by letters E, F and so on) to extract the final file to. A file labeled DIGICAP will appear in the USB flash drive.
- After the firmware has been extracted (unzipped), remove the USB flash drive from the computer and insert it into one of the available USB ports on the DVR/NVR unit.
- On the DVR/NVR, go to the Main Menu, and then go to Maintenance.
- From the sub-menus on the left click Upgrade. This will display the content of the USB flash drive.
- Choose the DIGICAP file and press Upgrade.
- An information window will pop up prompting that the unit will reboot after the upgrade is complete. Click YES.
- To verify that the firmware has been upgraded, after the DVR/NVR is rebooted, go to the Main Menu, and then go to System Information. The current firmware version will be displayed.
Click here to see a video tutorial of the above steps.
FURTHER ASSISTANCE
If you need further assistance with changing passwords, technical bulletins, or related downloads, please contact Hikvision USA Technical Support at 909-612-9039 (phone) or techsupport.usa@hikvision.com (email). For Hikvision Canada Technical Support, call 855-655-9888.
UPDATING FIRMWARE
Hikvision regularly updates the firmware in our products to resolve potential issues and keep your system running smoothly. Below, you can find guidance on how to update your system accordingly.
Updating Hikvision IP Camera Firmware
To upgrade the firmware of a Hikvision IP camera, please follow the steps below:
- Locate the appropriate firmware by clicking this link
- Click on the firmware, then click download.
- Agree to the license terms and conditions when prompted.
- Locate the downloaded firmware file (this typically will be in the default download folder, unless prompted for a download location, then choose Desktop) and extract it by right-clicking on the file and selecting extract all or unzip. When prompted for an extract location, choose Desktop to extract the final file to. A file labeled DIGICAP will appear on the desktop.
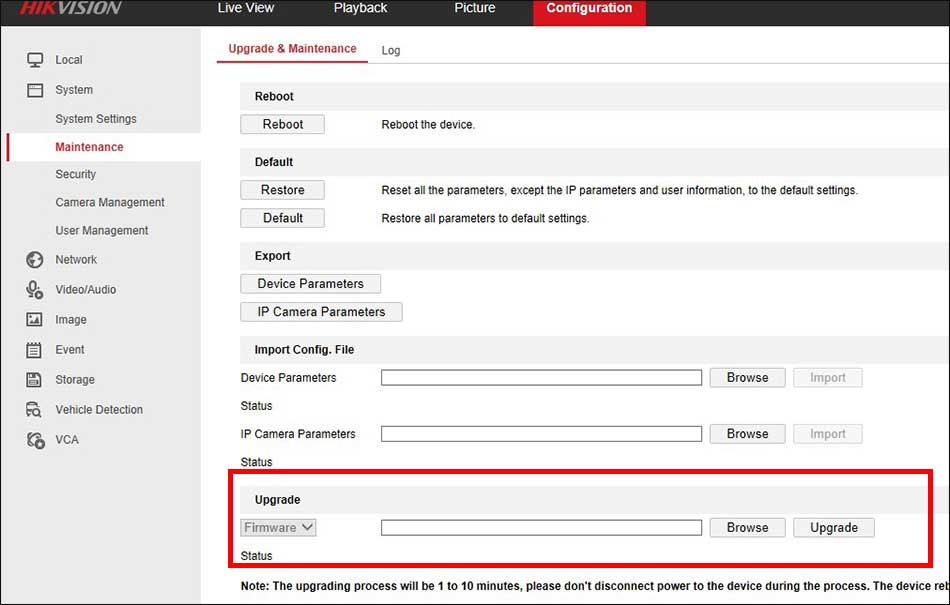
- After the file is extracted, log into the camera using Internet Explorer or Firefox web browsers. If prompted to install the plugin (or to allow the plugin to run), follow the prompt to proceed with the upgrade procedure.
- Log into the camera using the administrator username and password, then go to the Configuration tab. In this tab, go to Basic Configuration then System, and then click on the Maintenance tab.
- On the bottom of the page under Remote Upgrade, press the Browse button to locate and choose the firmware file, which was previously saved on the Desktop. After selecting the file, click Open, then click Upgrade.
- The camera will display a prompt that a reboot is necessary to complete the upgrade. Click OK. The camera will reboot when the firmware is successfully upgraded.
Click here to see a video tutorial of the above steps.

