Views: 6
This guide will show you how to upgrade the firmware in your recorder. This guide only applies to Gamut recorders released in 2019 or after, primarily the WLNVR, 4/8NVRGT1 or 4/8DVRGT1 recorders. If you are unsure which model you have, check your original order invoice.
Firmware updates can damage a recorder if the system is turned off during the update process. Only perform this update at a time when you know the recorder will not be turned off. If you are updating using a memory stick, do not remove the memory stick during the upgrade process.
Before you begin
You will need to download the latest firmware file from our website:
Now open up the firmware file linked above and open the ‘hdvrupgrade’ folder.
If you want to upgrade the firmware using the recorder and a TV, insert a memory stick into the computer. Now take the file named “H2106_V191216V181220V191226V200318V200318V200318V191118.sw” and copy it onto your memory stick.
If you want to upgrade the firmware using a Windows or Mac computer, simply copy the file named “H2106_V191216V181220V191226V200318V200318V200318V191118.sw” and save it somewhere on your computer that you can find. Also, make sure you have the Surveillance Client program set up on your Windows or Mac computer as this will be needed to perform the update:
How to access your Gamut camera or recorder using a Windows or Mac computer
Let’s get started
Upgrading via recorder and monitor
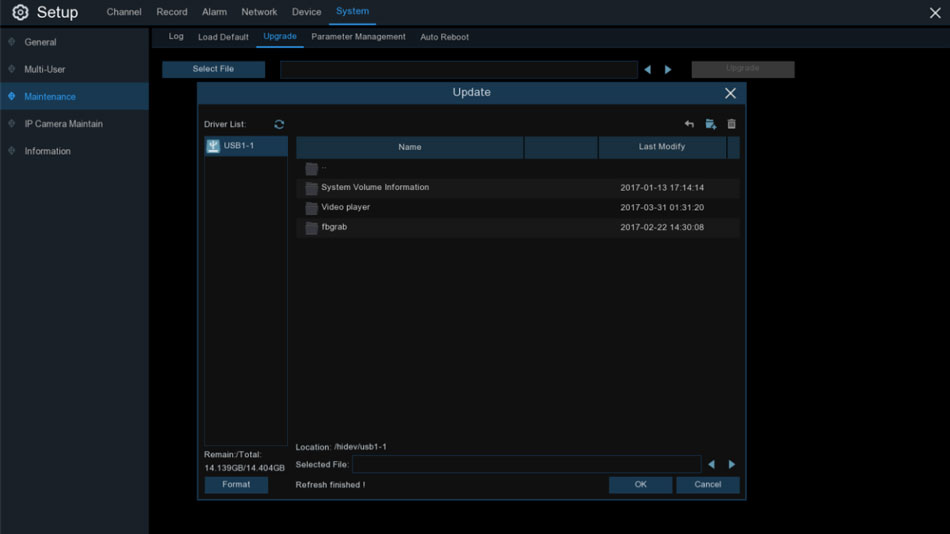
Enter the setup menu of the recorder, then select System > Maintenance > Upgrade.
Click on ‘Select File’ and find the firmware update file on your memory stick, then click ‘OK’. Click ‘Upgrade’ to start the process which will take 5-10 minutes; do not turn off the NVR or remove the memory stick during this time.


can you help me please
hello nice sharing thanks
I can’t upload
problem not solved thanks
my recorder is not working
hi how can i do
It really worked, I appreciate it!
It was a great sharing
Can you write your contact number?
my recorder is not working
can you help me please
I can’t upload
It was a great sharing
Can you write your contact number?
I sent an e-mail from the communication channel. Can you help?
please provide support for me i leave my email address
hi how can i do
I am having trouble with the installation
I really love you