Views: 6
How To IP Camera Connected to a Synology NAS, In this How To… Guide we are going to walk you through all the camera settings available to you when you add an IP camera to your Synology NAS, this also includes taking you through the record settings of the camera and how to playback any recordings you make, so lets start were we left off in our previous guide with the IP camera window open on your NAS and an IP camera added:
Step 1: Click the drop-down arrow at the right side of the IP camera window to see the default settings of the camera including where the camera is recording toIf the volume the camera is recording to is incorrect you can create a new one (follow our instructions HERE) or go into the camera settings and change the camera to record to an available volume
Step 2: Before changing any settings we advise clicking disable to stop the camera recording (this is not a necessity, you can edit settings while it still records but we would definitely advise disabling the camera if you are changing volumes just to stop the camera from continuing to record to the wrong volume)
Step 3: Select the camera from the list and click Edit and select Edit from the drop-down
A new window will then open displaying all of the camera’s settings, which we will take you through below:
How To IP Camera Connected to a Synology NAS
Device Settings
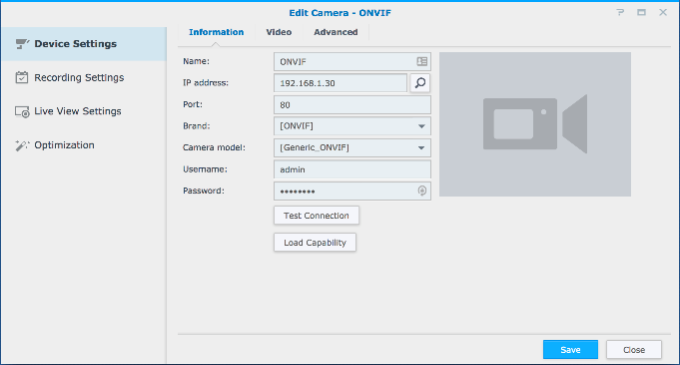
Information
This section allows you to edit the cameras name, you can change other details here but they won’t actually change the camera’s details. For example, if you change the IP address here it won’t change the IP address of the camera it will just try to connect to that address on your network, and if there is no camera at that address you won’t connect to anything.
The only time you want to change the other details here is if you access the camera outside of the surveillance station software and you change settings, you will then want to log back into the NAS and manually change cameras IP address, port, password, etc to match, otherwise the camera will remain at the old settings and show up as disconnected on the NAS
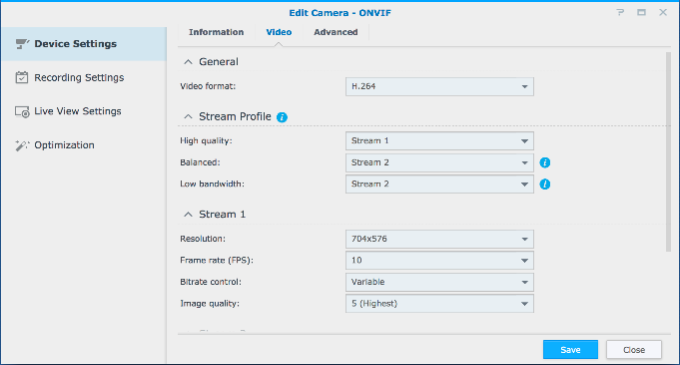
Video
The video page lets you select the format/CODEC that the camera will stream and record at (in most cases your options are H.264 or MJPEG, we recommend H.264 unless other options are available) as well as letting you set the settings of the cameras different streams and then select which stream is used for each of the Surveillance Station stream profiles (e.g. High Quality/Balanced/Low Bandwidth) – the number of streams you have available and the settings of streams varies between different models and brands
.
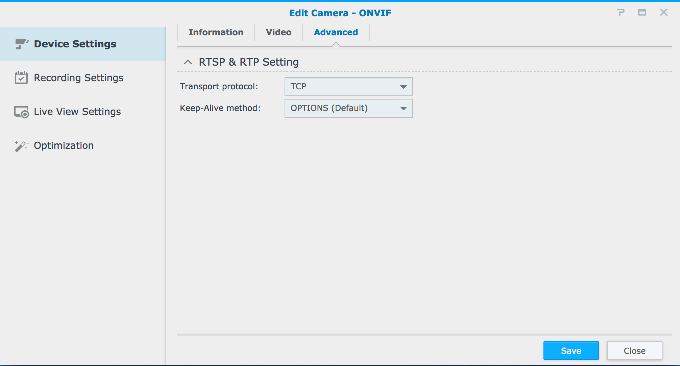
Advanced
On our demo Milesight camera (connected via ONVIF) this page lets you adjust the transport protocool and the keep-alive method, for most Synology users these settings are fine as they are but if you are using a different camera for your system we would advise still checking this page as there may be other advanced features that your camera has that this demo camera does not
.
Recording Settings
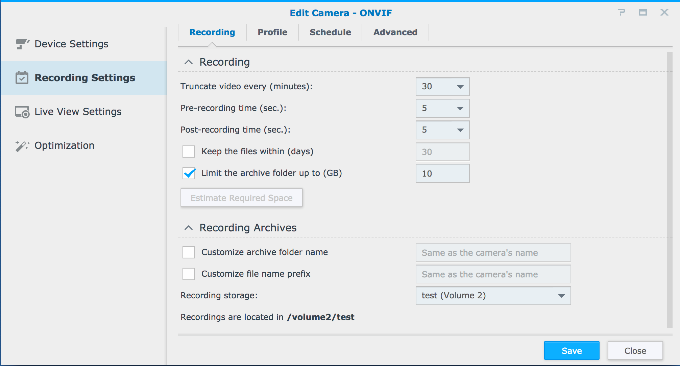
Recording
The recording page lets you set how the camera will record to your Synology NAS, you can select how long the camera records for before the recording is truncated (this is how long each file records for, so for example if you had 3 hours of recordings truncated every 30 minutes you would have 6 separate video files to cover that time frame). You can also set the pre and post-recording time, this is for when motion is detected or an alarm is triggered the camera will save a set amount of time before and after the detection.
You also have 2 tick boxes to select how you limit the camera’s recording (either only record for a certain number of days or record until a certain amount storage is filled) and then click the button to estimate the required space to record with these settings (save at this point if you want to test the space required – if you want to work out the space required quickly you can use our storage calculator).
The final part of this page lets you set custom names for the storage folder and the file name prefix, as well as letting you chose which volume you will record to
.
Profile
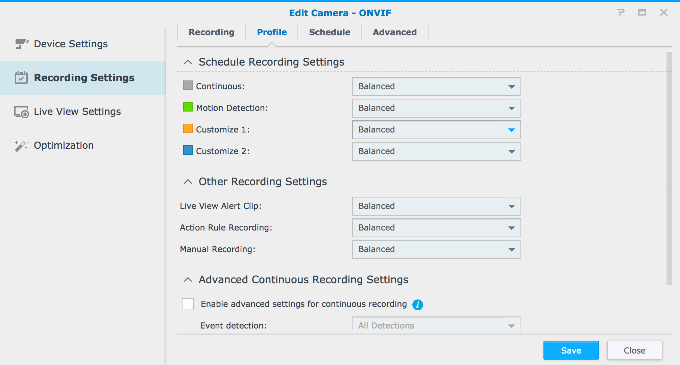
The Profile page lets you select which stream profile is used by each type of recording (including the stream profiles used when specific alerts and events are triggered)
.
The Profile page also features the ability to enable advanced continuous recording settings that let the recording switch streams when motion is detected or an alarm is triggered (e.g. if the camera is continuously recording at a lower quality to save space, it can be set to switch to a high-quality stream when motion or an alarm triggers the camera)
.
Schedule
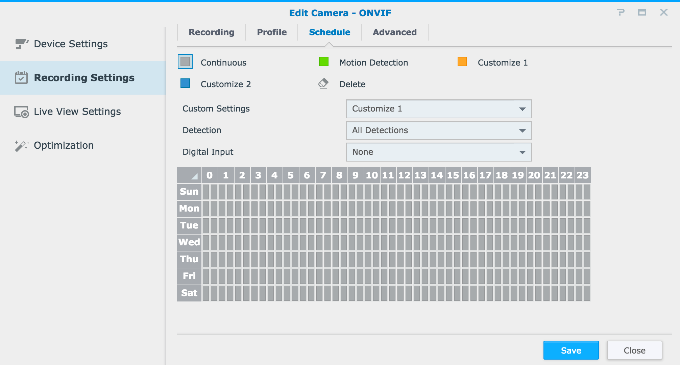
The schedule page lets you set a custom schedule for when the camera should record and whether the camera should record continuously, only when motion is detected, or custom type of recording.
.
Advanced
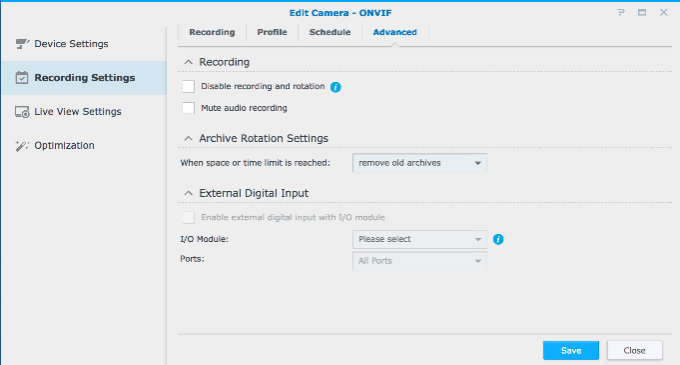
The advanced page has some other important recording settings like tick boxes to disable all types of recording and disable audio recording (it is important to be aware that recording audio will increase the storage used by the camera). This page will also let you set what the camera does when the recording space is full, you can either have it set to overwrite the oldest footage or the camera can be set to just stop recording. On this Advanced page you can also set up an External Digital Input – this feature is only available on certain camera models
.
Live View Settings
General
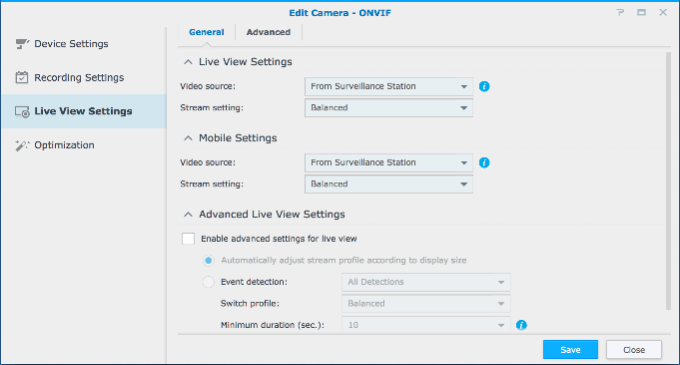
The General settings page lets you set the stream that the camera will use when you are live viewing the camera from a browser and on the mobile app (the video source will default to “from surveillance station”, you can change this to from the camera but you will have to port forward the camera first), also on this page you can set up advanced settings to have the stream settings change when motion or events are detected.
.
Advanced
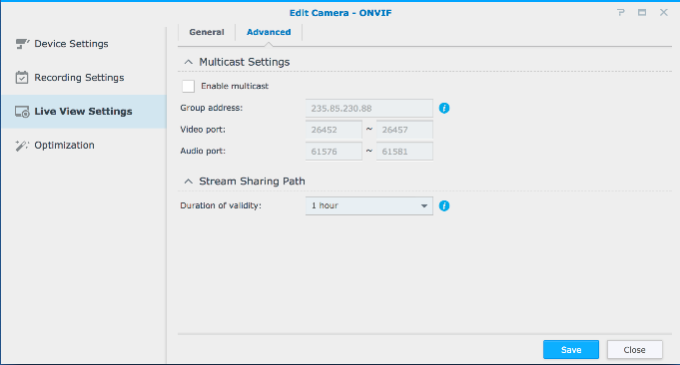
Advanced page lets you enable a feature called multicast, this is a feature that for most people operating a small IP system won’t be necessary, but if you need more support with it just ask)
.
Optimization
General
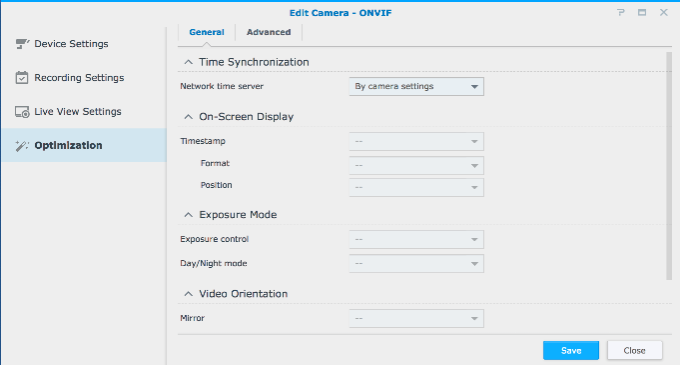
The general page allows you to edit some settings of the camera like Time/Date, Exposure Mode, Video Orientation, etc. The extent of how much control you have here all depended on the camera model and whether it is fully compatible with the Synology software (don’t worry if you are connected via ONVIF and these settings are greyed out, as you can still log in to the cameras individually and adjust the cameras from their own menus)
.
Advanced
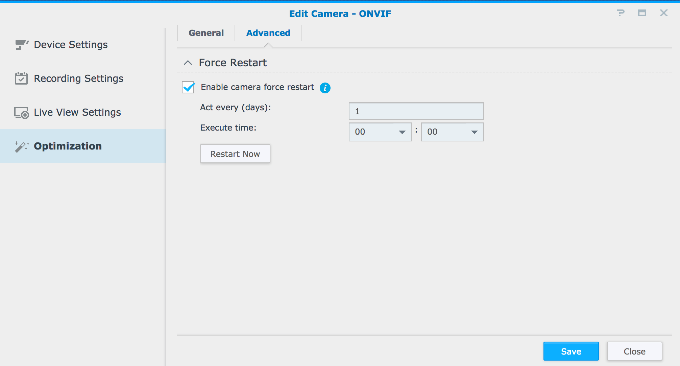
The advanced page is the final settings page and it allows you to enable the camera to force restart, this feature is only really important if you are using cheaper cameras as they can sometimes shutdown or drop of the network if left running for too long without a reboot, so this setting lets you set the camera up to automatically restart when a certain time is reached (this isn’t really needed for the higher quality products we sell e.g. Hikvision, Milesight, AXIS, Wisenet as we very rarely see cameras from these manufacturers disconnect or shutdown)
.
And that is all the settings covered, once you are happy you have the settings the way you like you can click save and you will be taken back to the IP camera window and if did disable the camera you can now enable the camera and you should see a red record circle appear on the thumbnail of the corresponding camera.
You can now live view the camera by clicking the icon on the home screen or after few minutes of recording you can click the timeline or recording icons to view your stored footage – we will go over the features of the Recording, Timeline and Live View windows in another forum post
Synology NAS IP camera setup, IP camera connected to Synology, Synology surveillance, Synology NVR, Synology IP camera configuration
Synology NAS IP camera add, Synology NAS IP camera view, Synology NAS IP camera record, Synology NAS IP camera motion detection, Synology NAS IP camera remote access
how to connect IP camera to Synology, Synology NAS IP camera guide, Synology NAS IP camera tutorial, Synology NAS IP camera for beginners, Synology NAS IP camera step by step
Synology NAS IP camera live view, Synology NAS IP camera recording settings, Synology NAS IP camera motion detection settings, Synology NAS IP camera PTZ control, Synology NAS IP camera integration
Synology NAS IP camera not working, Synology NAS IP camera no video, Synology NAS IP camera connection error, Synology NAS IP camera cannot connect
Synology, NAS, IP camera, surveillance, security camera, network video recorder, NVR
how to add ONVIF IP camera to Synology NAS, how to set up motion detection for Synology NAS IP camera, how to access Synology NAS IP camera remotely, Synology NAS IP camera best practices, Synology NAS IP camera compatibility
Synology AI, Synology cloud integration, Synology cybersecurity, Synology smart home integration, Synology edge computing
Synology Surveillance Station, Synology DSM, Synology Active Backup for Business
Synology NAS IP camera firmware update, Synology NAS IP camera port forwarding, Synology NAS IP camera DDNS, Synology NAS IP camera ONVIF, Synology NAS IP camera RTSP
