Views: 8
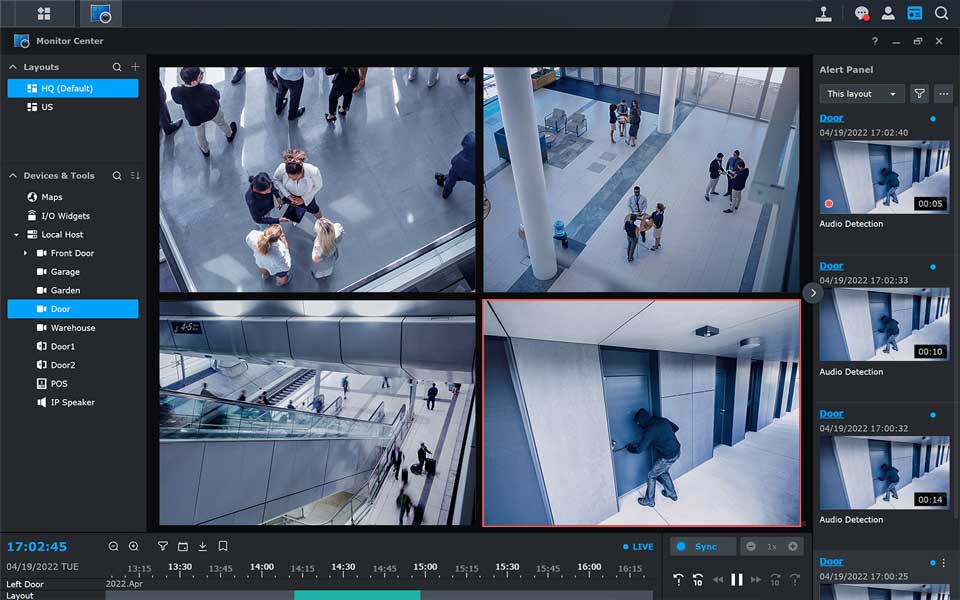
How To Install Synology Surveillance Station, In this How To… Guide we are going to take you through how to install Surveillance Station software to a Synology NAS and then show you how to add an IP camera to that software. This guide is aimed at people who have just setup a NAS or have pre-existing NAS that they want to start using for IP camera management and storage, if you are setting up your NAS for the first time this thread is not for you, either follow the instructions in the box, look at other threads in the Synology section of this forum, or ask us for help.
Once you have the NAS setup you can come back to this post and follow the steps below:
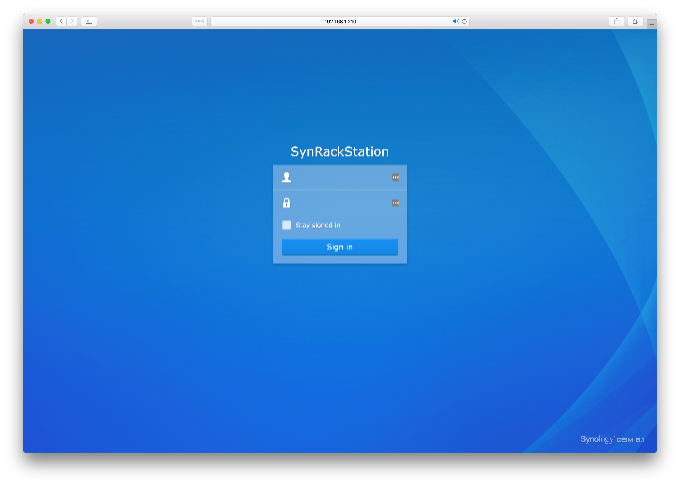
Step 1: Login to your Synology NAS via a browser
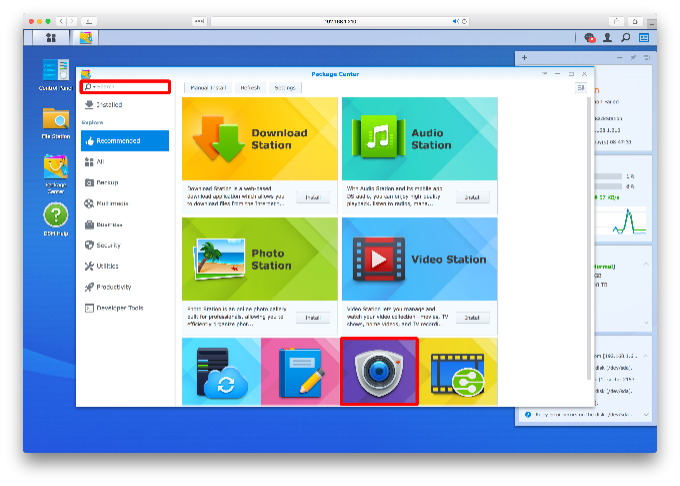
Step 2: Click the Package Center icon
Step 3: Search for and install the Surveillance Station software (it should be on the home page of the package center, if not you can use the search bar to find it)
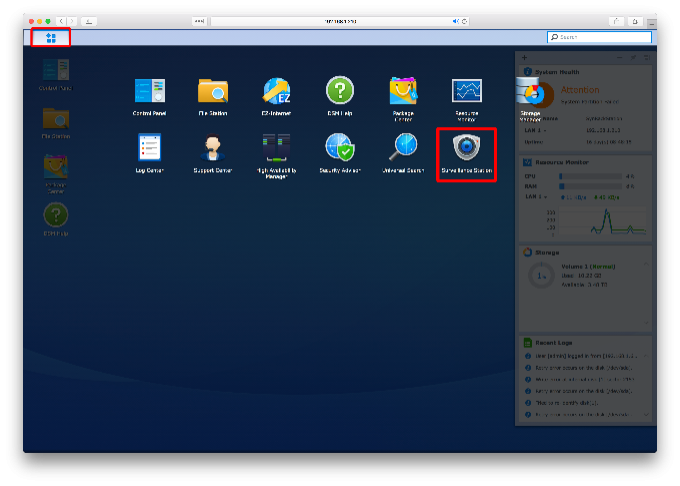
Step 4: Click the Synology main menu at the top left of your screen and open the newly installed Surveillance Station software
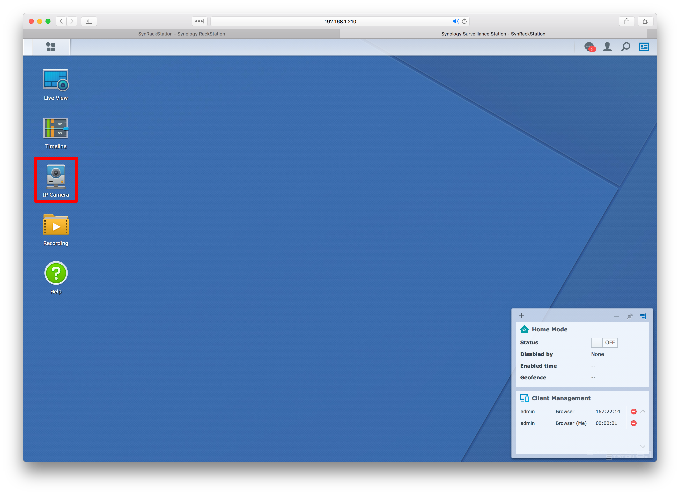
Step 5: Click the IP Camera icon
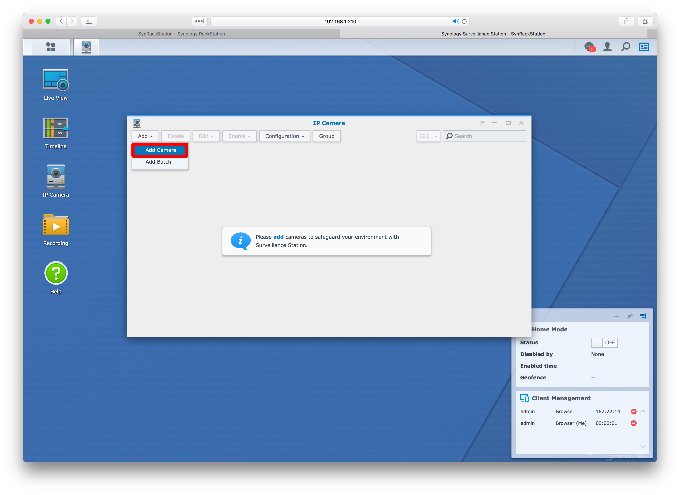
Step 6: Click the add button when the new window open and then click add camera from the drop-down
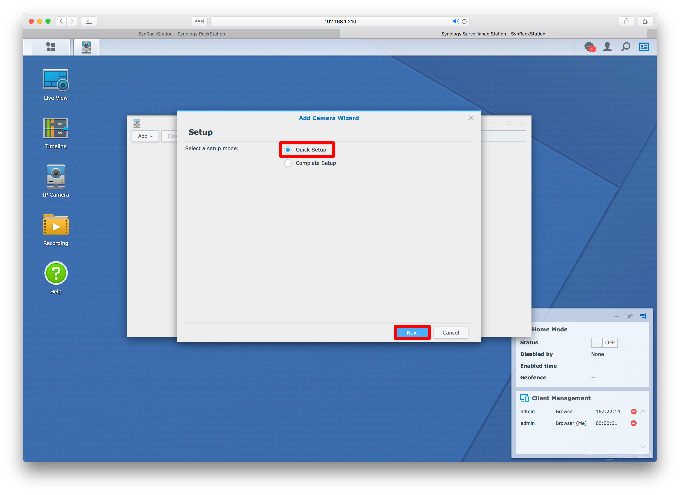
Step 7: Select Quick Setup and then click the next button
Step 8: Enter the camera details manually or click the Search icon next the IP Address box
Step 9: Check both the Synology Supported Cameras and ONVIF lists (some camera models are not directly supported by Synology, but as long as the camera is ONVIF compliant you should be able to add it to the Surveillance Station software)
Step 10: Select the camera you want to add from one of the lists and click OK
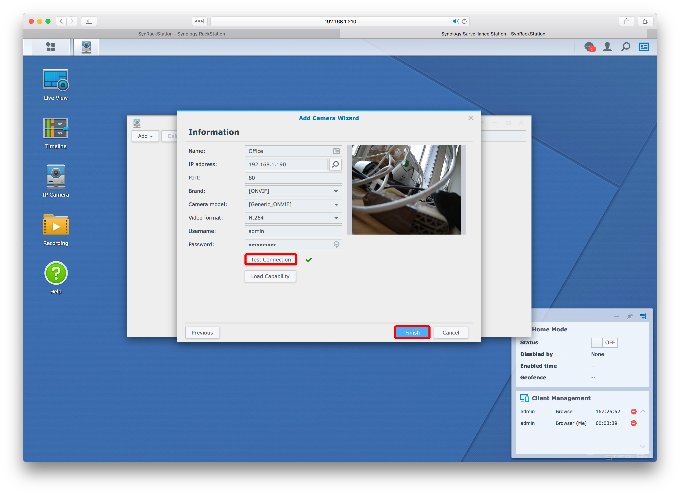
Step 11: Check that all the camera details are filled in, including the cameras username & password (also give the camera a unique name to help you identify it from other cameras)
Step 12: Click the Test Connection button and if the test is successful you’ll get a green tick and a live shot from the camera, you can then click Finish and the camera will be added to your Synology NAS
If the test is not successful you will have to go back and check the camera’s settings are correct, the most common problem is that the camera has an IP address that is not on your network, after you have followed our instructions from a previous video on how to change the IP address you should get a successful connection and be able to add the camera
.
If you need more help with installing Surveillance Station and adding an IP Camera to your Synology NAS you can watch this video:

How To Create a Storage Volume on a Synology NAS for Recording IP Cameras
.
The key feature of Network Attached Storage (NAS) devices that sways people into using them over NVRs is that NAS devices can be used to record anything and not just IP cameras, this means that if you have enough storage you can use a section of your NAS to store videos, music, and general files and another section of the same NAS for storing your IP camera footage.
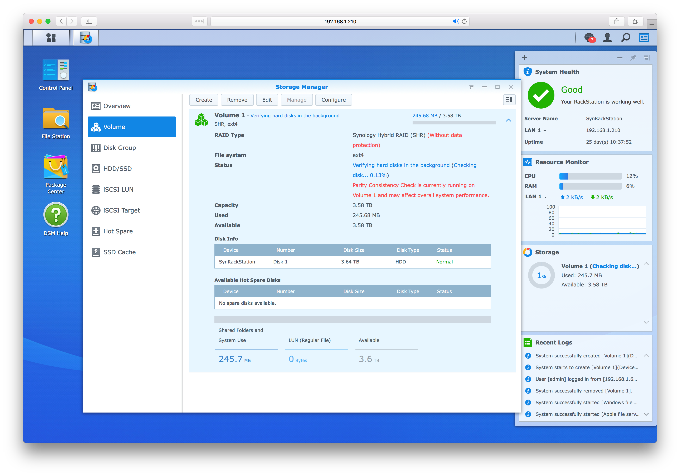
To store multiple types of file on one NAS you need to segment the available storage space, you do this by following the steps below to create a volume
How To Install Synology Surveillance Station
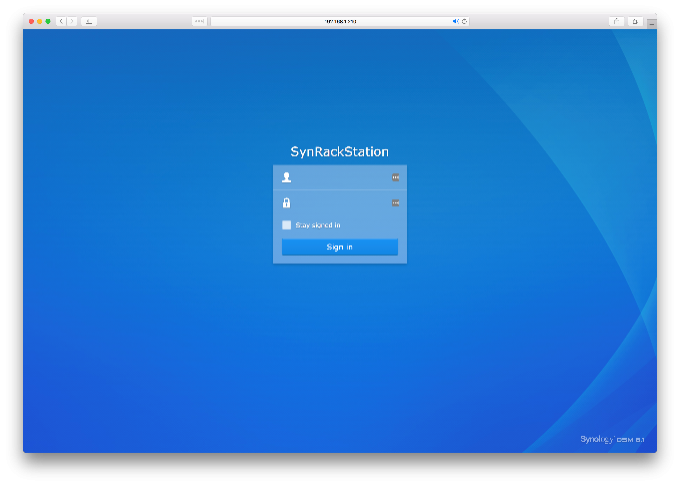
Step 1: Login to your Synology NAS
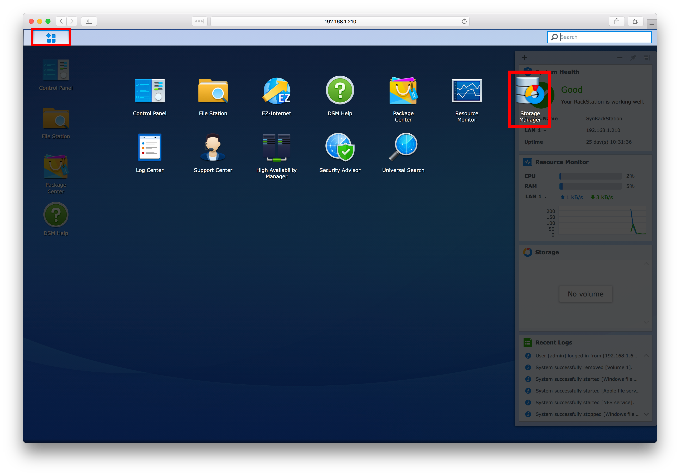
Step 2: Click the main menu and then open the Storage Manager window
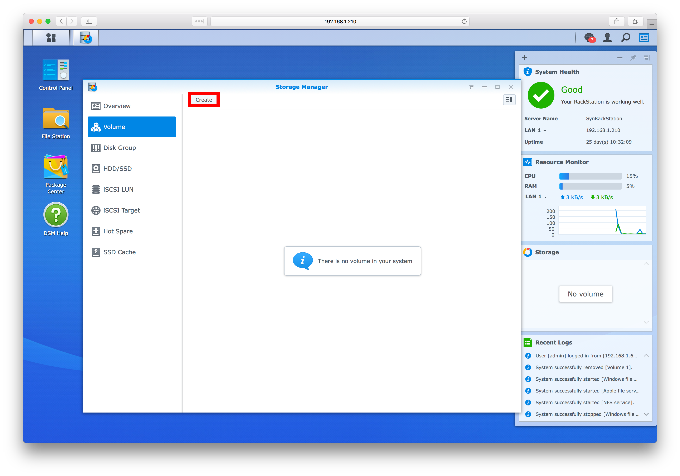
Step 3: Click the Volume tab from the menu on the left of the storage manager window
Step 4: Click the Create button at the top left of the volume window
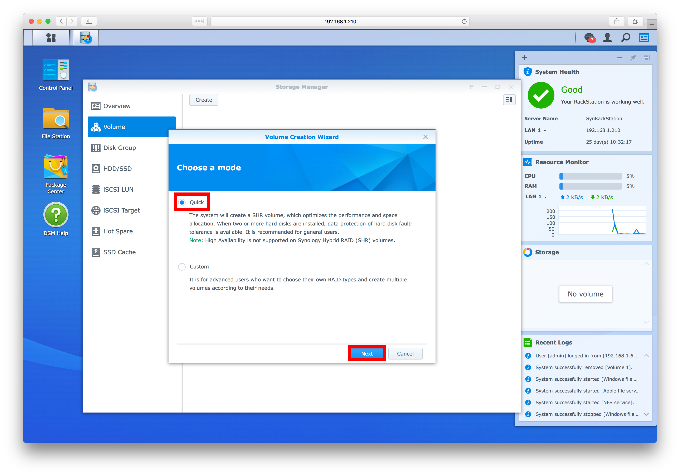
Step 5: When the Wizard opens select either Quick Setup or Custom Setup and then click next (If you’re new to this we would recommend just sticking with quick setup)
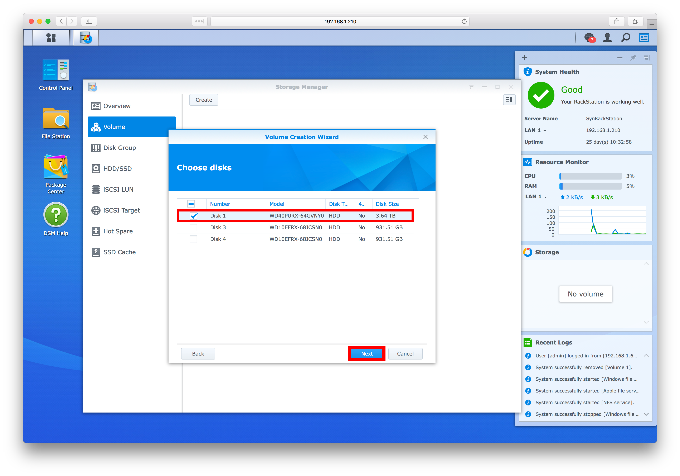
Step 6: Select the Hard Drive Disks that you want to include in this volume and then click next (we chose just 1, but if your NAS is larger or you are recording more cameras you can use as many as you like – but be aware that once created volumes can’t be changed without deleting them, so give yourself enough space)
Step 7: Select Yes to do a disk check of the selected hard drives and then click next (we recommend doing this all the time, but especially if the HDD is new or has been repurposed from another storage device)
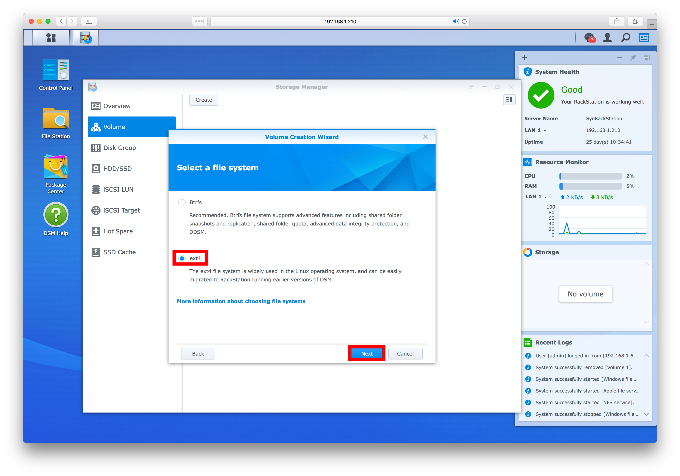
Step 8: Select the file system you want to save your files with, ext4 or Btrfs, and then click next (we recommend ext4 as it is the established standard)
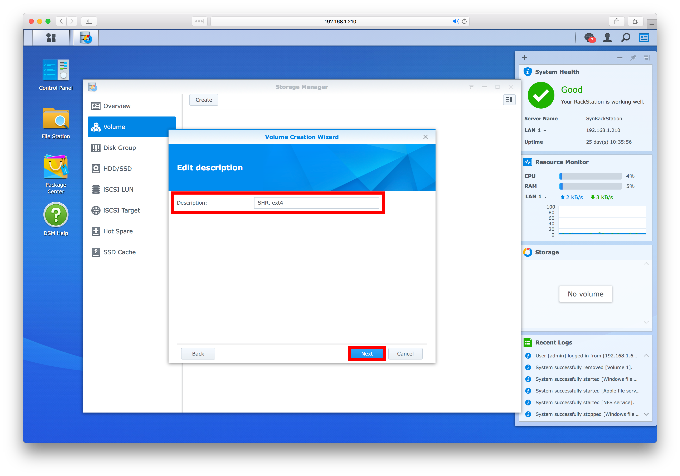
Step 9: Edit the description of the volume by giving it a name that relates to what you are going to use it for or just leave it as the default, then click next
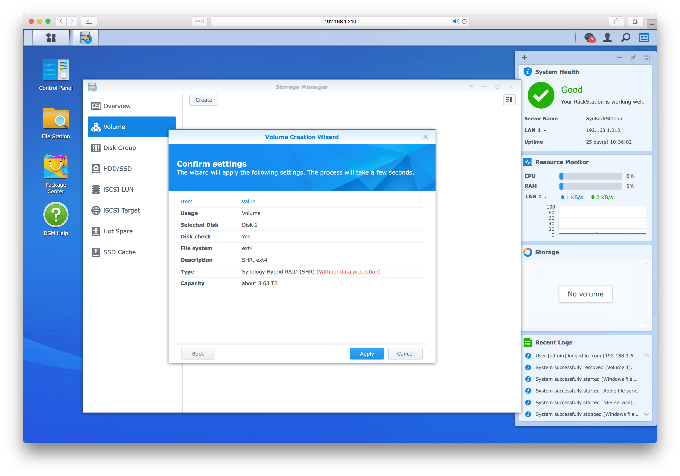
Step 10: Double check the settings you have chosen and then click apply
After a few seconds, you will be taken back to the volume page and the newly created volume be created and ready to be used for whatever storage you want
.
Be Aware that after creating a volume the NAS device will want to do a Parity Consistency Check which can take a while and can affect the devices overall performance while it completes the check
Synology Surveillance Station installation, Synology Surveillance Station setup, Synology NVR setup, Synology IP camera setup, Synology security system
Synology Surveillance Station guide, Synology Surveillance Station tutorial, Synology Surveillance Station for beginners, Synology Surveillance Station troubleshooting, Synology Surveillance Station configuration
how to install Synology Surveillance Station, Synology Surveillance Station step by step, Synology Surveillance Station quick start, Synology Surveillance Station user manual
Synology Surveillance Station live view, Synology Surveillance Station recording, Synology Surveillance Station motion detection, Synology Surveillance Station remote access, Synology Surveillance Station mobile app
Synology Surveillance Station not working, Synology Surveillance Station error, Synology Surveillance Station cannot connect, Synology Surveillance Station no video
Synology, Surveillance Station, NVR, IP camera, security camera, surveillance system
how to add IP cameras to Synology Surveillance Station, how to set up motion detection in Synology Surveillance Station, how to access Synology Surveillance Station remotely, Synology Surveillance Station best practices, Synology Surveillance Station performance optimization
Synology AI, Synology cloud integration, Synology cybersecurity, Synology smart home integration, Synology edge computing
Synology NAS, Synology DSM, Synology Active Backup for Business
Synology Surveillance Station firmware update, Synology Surveillance Station port forwarding, Synology Surveillance Station DDNS, Synology Surveillance Station ONVIF, Synology Surveillance Station RTSP
