Views: 9
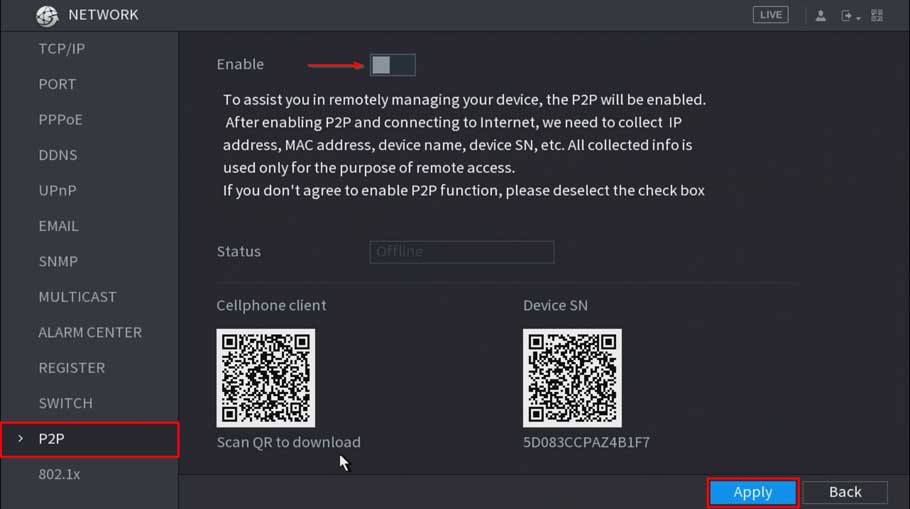
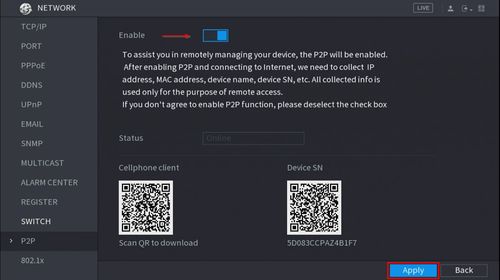
P2P Enabled (Dahua Device Only)
| Interface | Image |
|---|---|
| WebUI | 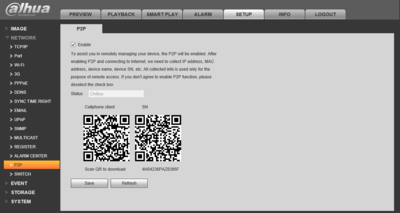 |
| SystemUI | 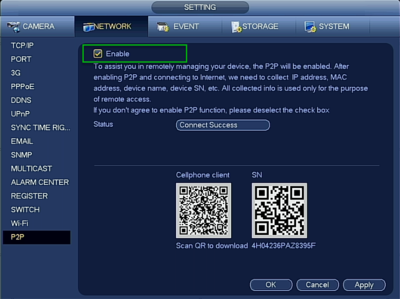 |
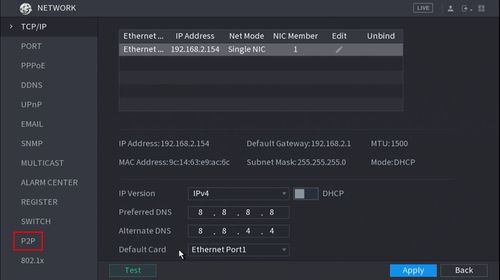
DHCP Enabled
| Interface | Image |
|---|---|
| WebUI | 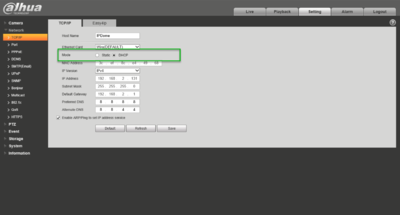 |
| SystemUI | 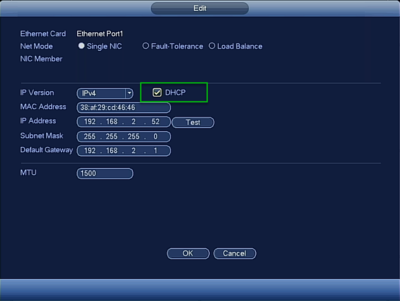 |
DNS 1 = 8.8.8.8
| Interface | Image |
|---|---|
| WebUI | 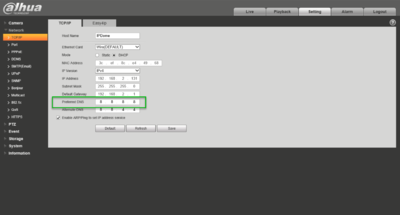 |
| SystemUI | 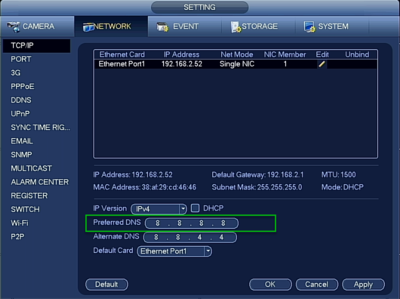 |
DNS 2 = 8.8.4.4
| Interface | Image |
|---|---|
| WebUI | 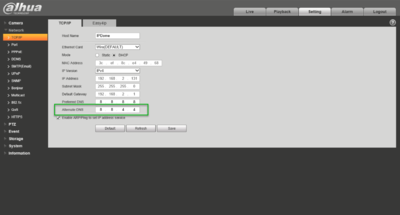 |
| SystemUI | 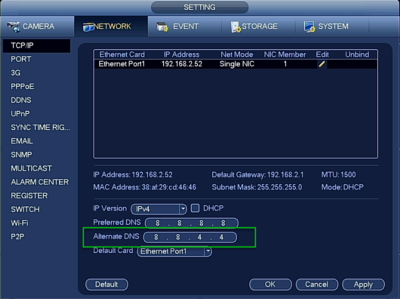 |
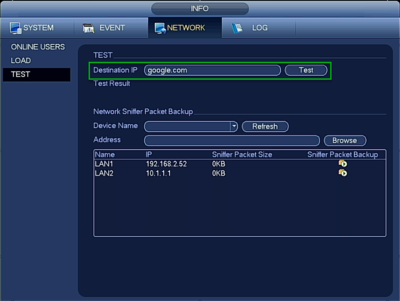
Ping Test:Success
SystemUI only.
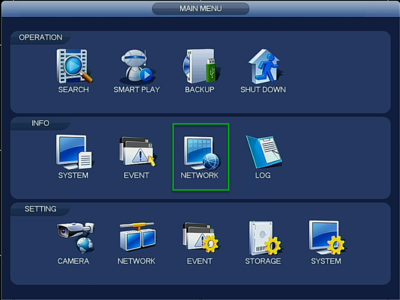
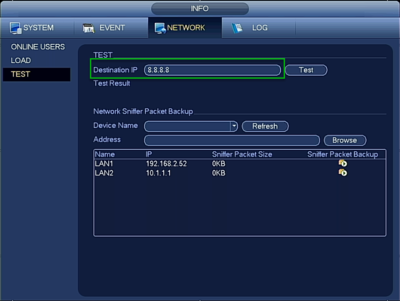
1. Navigate to Main Menu -> Info -> Network -> Test
2. Input, “8.8.8.8” for Destination IP.
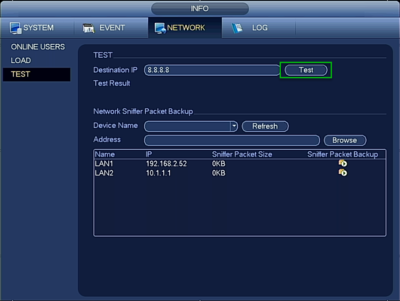
3. Click, “Test”
4. Repeat these steps, replace, “8.8.8.8” with, “google.com”
Ping Test:Results-Success
| Address | Status | Image |
|---|---|---|
| Google.com | Success | 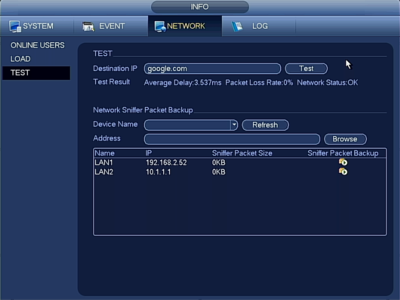 |
| 8.8.8.8 | Success | 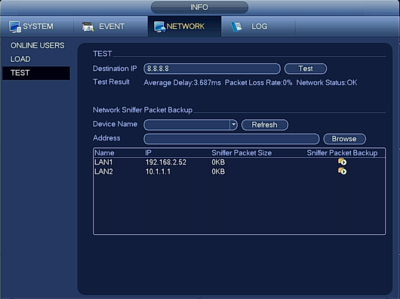 |
Ping Test:Results-Fail
| Address | Status | Image | Troubleshooting Tips |
|---|---|---|---|
| Google.com | Fail | 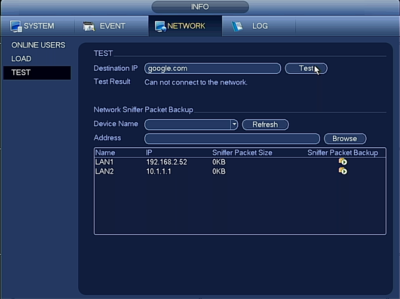 |
|
| 8.8.8.8 | Fail | 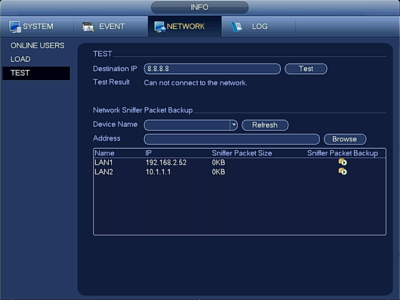 |
|
Default TCP Port
- 37777 for Dahua Device
- 35000 for FLIR device
Confirm All of the Above, Then Reboot
Reboot the recorder or camera after confirming all the above to be true
Network Sniffer Packet Backup New GUI
This feature is available at the SystemUI only.
Prerequisites
- USB drive, formatted to FAT32
- Dahua Recorder, connected to a network
Video Example
Instructions
1. Insert a USB drive (FAT32 format) into the device. Most models of Dahua recorders will have a USB port on the front and rear of the unit, either can be used.
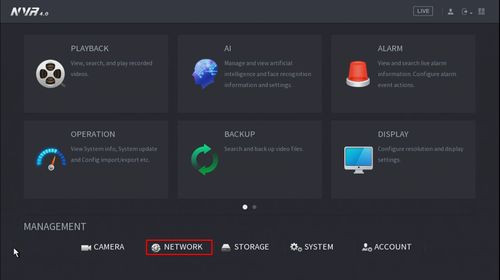
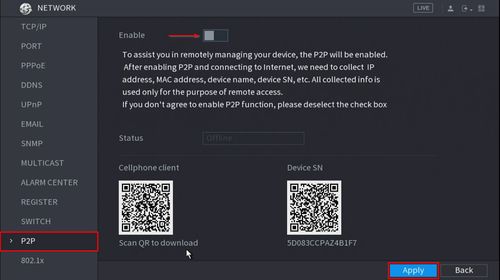
2. From the Main Menu go to Network
3. Click P2P
4. Click to disable the P2P feature
Click Apply
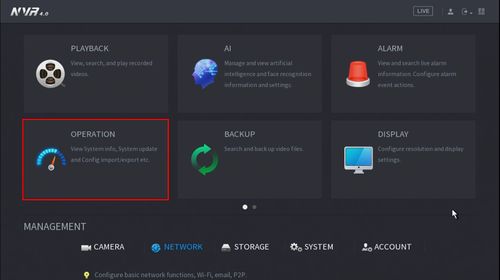
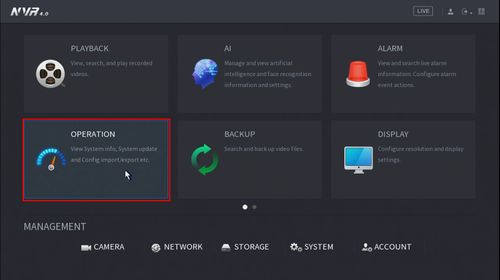
5. Return to the Main Menu
Click Operation
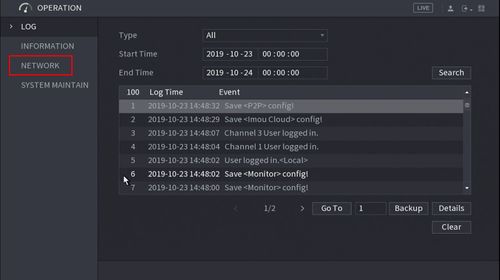
6. Click Network
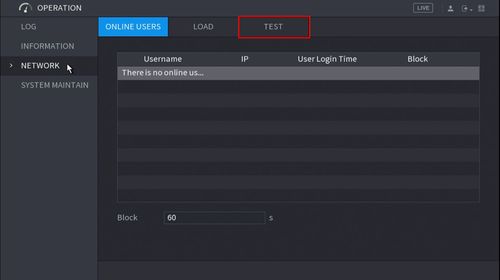
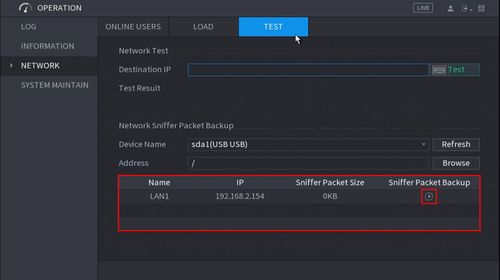
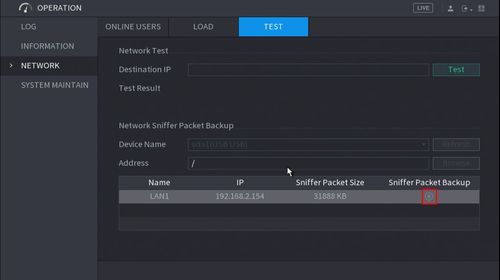
7. Click Test
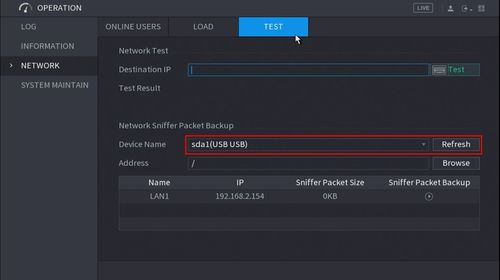
8. Confirm the USB drive is detected, under Device Name
Click ‘Refresh’ if you do not see the device in the drop-down box
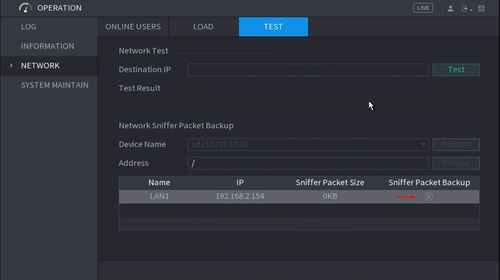
9. Click ‘Sniffer Packet Backup’ next to the appropriate NIC card to begin the backup
10. The icon will change once the backup has begun
11. Return to the P2P menu
From Main Menu click Network
12. Click P2P
Click to enable the P2P service then click Apply
13. Return to the Main Menu
Click Operation
14. Click the Pause button under ‘Sniffer Packet Backup’
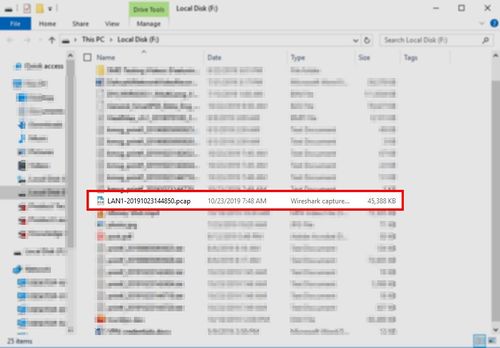
15. Remove the USB drive from the recorder and connect it to a PC
You should have one or several *.PCAP files. Please email these files to your Technical Support Representative for further analysis.



I can’t upload
hello nice sharing thanks
please provide support for me i leave my email address
problem not solved thanks
can you help me please
I can’t upload
I can’t upload
problem not solved thanks
I really love you
It really worked, I appreciate it!
It was a great sharing
I can’t upload