Views: 18
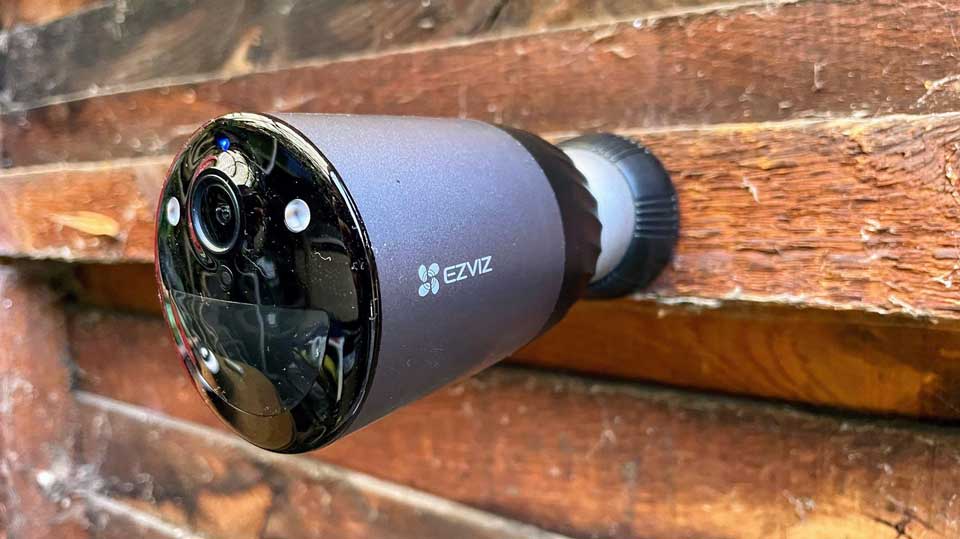
EZVIZ Security Cameras FAQ, The EZVIZ app is designed to work with our series of Security Cameras and other Smart Home products. By using this app, it is so easy to manage your camera and other smart home devices remotely from across the globe any time.
You can get full access and remote control of all devices functions at fingertips, and take necessary actions to ensure the safety of your homes, businesses and loved ones when receiving immediate motion detection alerts on your phone.
Connecting your EZVIZ security cameras with voice assistant(s), such as Amazon Alexa and Google Home, is a simple process.
Checklist before setting up:
√ Make sure you have downloaded EZVIZ App and Amazon’s Alexa App/Google Home App on your phone.
√ Make sure your EZVIZ security camera has been added to EZVIZ App successfully;
√ Turn off ‘Image Encryption’ of your EZVIZ security camera:
1) Log in to your EZVIZ App and go to device setting;
2) Look for ‘Image Encryption’ and tap to turn it off.
3) Enter the verification code (as the default password) to apply the change.
√ Change the name of your EZVIZ security camera:
1) Go to device setting
2) Tap on ‘name’ and change it based on your need, such as ‘front door camera’ or ‘baby room camera’.
Enable EZVIZ skills on Amazon Alexa
Video tutorial: https://youtu.be/ro3Y8AkXJ7M
1. Log in to your Alexa App.
2. Choose ‘Add Device’ from the menu.
3. Choose ‘Camera’ and select EZVIZ to enable the skill.
4. Enter your EZVIZ username and password in order to authorize Alexa to access your EZVIZ account.
5. Tap ‘Discover Devices’ to allow Alexa to discover all your EZVIZ devices.
6. Go back to Alexa app menu and you should see all your EZVIZ devices under ‘Cameras’.
Connect EZVIZ devices to Google Home
Video tutorial: https://youtu.be/v3nrrosYRr8
1. Log in to your Google Home App.
2. On the home screen, tap ‘Add’, then ‘Set up device.’
3. Select ‘Have something already set up?’
4. Type and search ‘EZVIZ’, then select it.
5. Enter your EZVIZ username and password in order to authorize Google Home to access your EZVIZ account.
6. Once the device is linked successfully, follow the prompts to finish the setup.
EZVIZ Security Cameras FAQ
Read More : Ezviz Firmware and Software Downloads
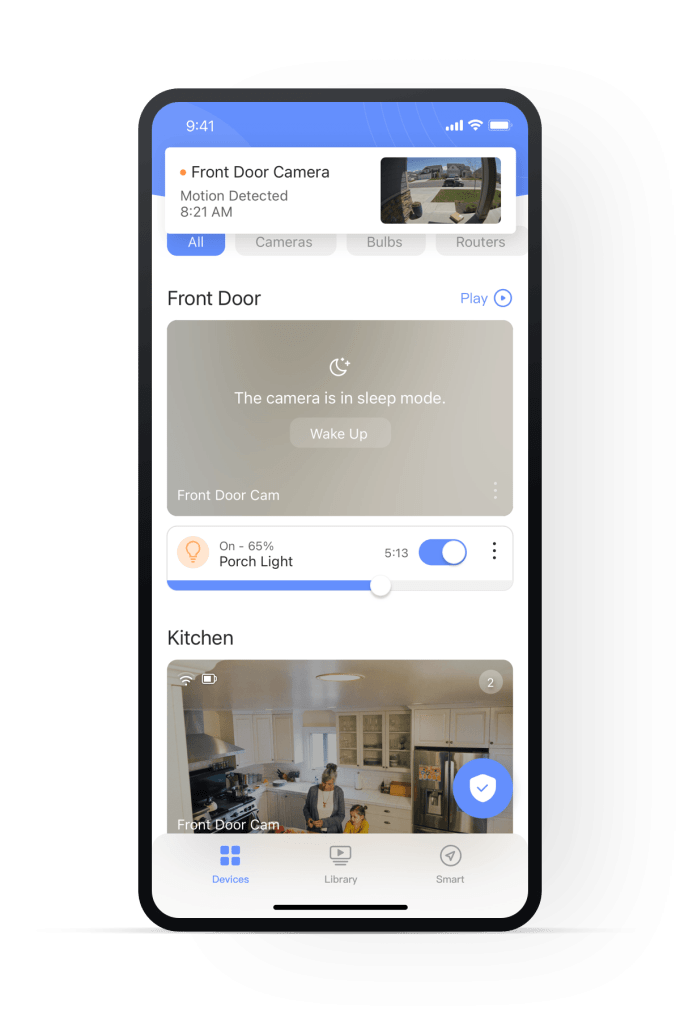
Checking in from anywhere
View live feed of all your EZVIZ cameras, doorbells, and more at the same time. See what’s happening inside your home while you’re away.
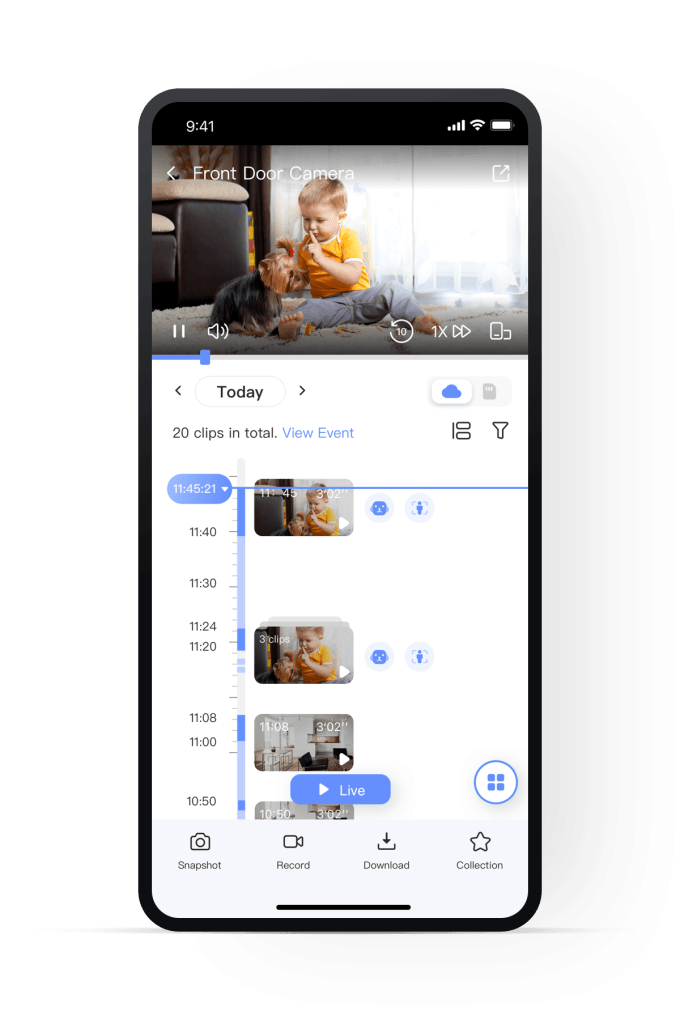
 Rewind to see what happened
Get to know what you’ve missed with snapshots of the moment. Remotely play back video recordings stored on your CloudPlay and/or micro SD card.
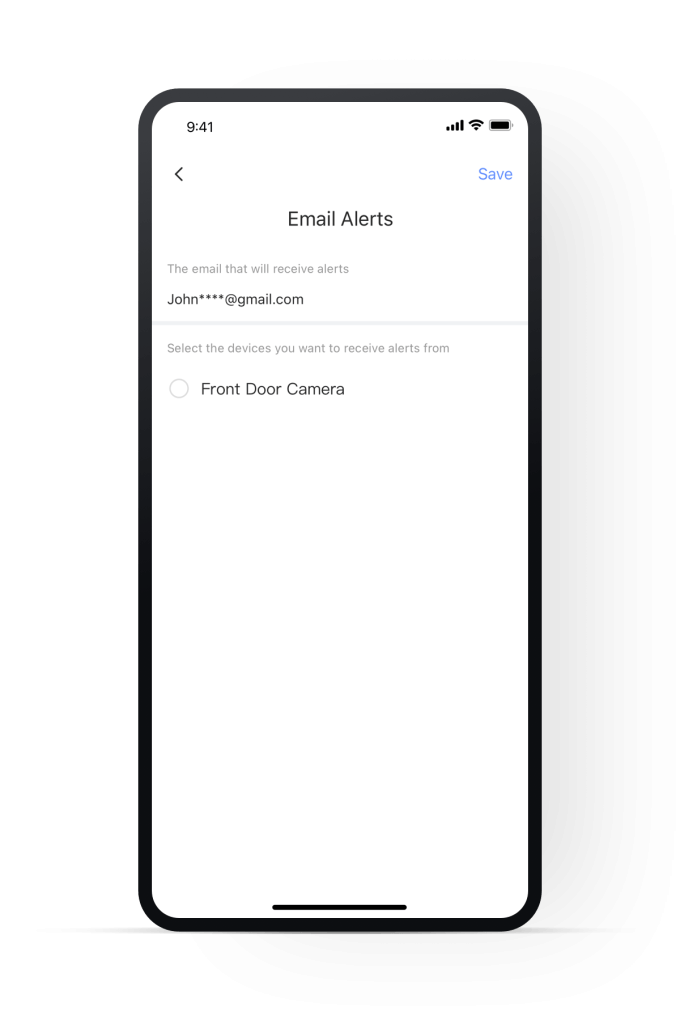
 Get instant alerts for what matters
Receive push notifications or emails in real time when a motion detection is triggered. Filter out the irrelevant alerts by customizing the detection zone and sensitivity.
How to add device?
1. Download the EZVIZ APP to your mobile phone from the App Store (for iOS), Google Play (for Android), or HUAWEI APP Gallery (for HUAWEI).
2. Register an EZVIZ account with your email or phone number and log in.
3. Reset your camera by pressing the reset button for about 10-15 seconds, for some cameras you will hear the voice of “Reset successfully”. Then wait for about 1 minute or a few seconds, when you see the indicator light change into red-blue flashing alternately or blue light flashing fast (for some cameras, there is no light change for your reference, that’s ok, you just wait for about 1 minute).
4. Connect your phone to 2.4G wifi only, then tap the “+” button on the home page to scan the QR code that is on the label of the device. You can find a label on the back or bottom of the device. (Please make sure your phone is connected to 2.4G wifi only and you give the camera permission to the EZVIZ app)
5. Then follow the instructions on the APP to connect the device to your wifi.
6. After adding the device to your account, you will be able to view your cameras.
How to reset the EZVIZ security camera?
Hold the reset button for 5-10 seconds and wait for the prompt informing you that the device has been reset successfully. Some cameras will not give you the prompt; however, wait for 1-2 minutes for the indicator lights to flash blue. Generally, reset takes about 1-2 mins.
How to deal with the system message “Device is offline”?
1. Please check the status of the indicator light first:
– If it is solid blue or flashing blue slowly, please refresh the home page on the EZVIZ APP to check whether the camera becomes online or not.
– If the indicator light is flashing red slowly, you can try the following two methods:
1) Please reboot your router as it may be experiencing connectivity and range issues.
2) Unplug your camera, wait for 10-30 seconds, then plug it back in to see if this solves the offline problem.
2. If the camera is still offline, you can try to reconfigure it by following the steps below:
– Connect your smartphone to your 2.4GHz home Wi-Fi network if your camera supports 2.4GHz only.
– Open your EZVIZ APP, tap the three-dot icon to enter the Device Settings page and tap the Wi-Fi button.
– Reset the device by pressing the reset button for a few seconds.
– Wait for a while, make sure the indicator light turns to flash blue quickly and tap Next.
– Check that your WIFI and password are correct. Then tap Next to connect to device AP.
– Please wait for the device to be configured and your device should be back online.
Does EZVIZ product support 5 GHz Wi-Fi?
Most products are configured to support 2.4 GHz Wi-Fi network mode; however, some products do support 5 GHz. The following products support 2.4/5 GHz Wi-Fi network mode:
DB1, Mini Plus, C6P, C6, C6Wi, E6, H6, DB1C, DB1 pro, HP7 support 2.4 GHz & 5 GHz.
Sports camera S5 Plus supports 2.4 GHz & 5 GHz.
Router W3 support dual band 2.4 GHz and 5 GHz.
All other security cameras support only 2.4 GHz Wi-Fi network mode.
How to upgrade action camera?
There are two method
Method A: online upgrade
1. Use EZVIZ SPORTS App.
2. If there is a new firmware release, then the app will have a notification. You can according to the notification upgrade or not.
Method B: offline upgrade
1. Visit EZVIZ support center (https://service.ezvizlife.com/download ) to download the new firmware.
2. Input the new firmware to SD card.
3. Reboot the action camera, then it automatically upgrade.
4. After upgrade success, camera will reboot again
Note: the new firmware should put in the outermost directory. The camera power should over 50% when upgrade.
How to solve Wi-Fi configure failed issue?
Please check the following settings below:
1) Check the frequency band on your router to ensure that it allows 2.4 GHz network mode transmission if your device supports 2.4 GHz only..
2) Ensure that your mobile phone is on the WiFi and ensure that the WiFi network is active and functional
3) Check the network condition:
•Make sure your network has no firewall and no other limit.
•Ensure the router can distribute IP address to your device or disable the static IP setting (DHCP is enabled by default on all EZVIZ devices).
4) Reset your camera; ensure that your device is in ready mode or Wi-Fi configuration mode > then use the EZVIZ mobile app for device Wi-Fi configuration.
If the Wi-Fi environment changes, how to put the device back online?
To connect to a different Wi-Fi network, please follow the steps below:
1. Press and hold the RESET button on your camera for about 5-10 seconds to reset it. This will allow you to start the process of reconnecting the device to the Wi-Fi.
2. Make sure your EZVIZ device is in Wi-Fi configuration mode.
3. Open the EZVIZ mobile app on your smartphone.
4. From the Home page of the app, tap the 3-dot icon next to the name of your camera to enter the Device Settings page.
5. Tap the “Wi-Fi” or “Network Settings>Wi-Fi“.
6. Follow the prompts and instructions in the EZVIZ mobile app to complete the setup and connect your device to the new Wi-Fi network.
Why EZVIZ products are differentiated by country/region?
As different countries have different requirements including legal, cloud service server requirements, we have to tailor the product to better serve our customer.
What should I do when the Wi-Fi connection fails during device pairing?
Please follow the steps below:
1. Make sure that the Wi-Fi router is good and functional. You can check it on EZVIZ mobile app by clicking “Network Testing” on the configuration failed page or check if your mobile phone can browse the Internet by turning off data and connecting only to Wi-Fi.
2. For EZVIZ devices that support 2.4G Wi-Fi only, ensure that you connect your mobile phone to 2.4G Wi-Fi before network configuration.
3. Make sure that your Wi-Fi network signal is good. Most EZVIZ devices perform better when the upload speed is higher than 2 Mbps for each camera. You can check your Wi-Fi signal in the EZVIZ mobile app by clicking the profile photo on the top left–Settings–Device Network Tools–Check Wi-Fi Signal.
4. If not good, please follow the steps below to improve your network:
– you can try to move the camera closer to your router, avoid obstacles and interferences such as wall, elevator, microwave, washing machines and Bluetooth devices.
– If possible, unplug some infrequently used devices from your router or reboot the router.
– Try to change the Wi-Fi channel to a less crowded one.
5. Please also review some other network requirements that may help resolve your issue:
– Make sure that DHCP is enabled on your router.
– Verify that IPV6 is turned off on your router.
– Make sure that the blacklist/whitelist firewall settings are turned off on your router.
6. If your camera supports Ethernet cable, you can also try to connect it via cable. Alternatively, if possible, try connecting the camera to another home Wi-Fi.
How to add device via S/N?
Step 1: On the Devices page, tap the “+” icon at the top right, then tap “Add Device“
Step 2: Tap the scan icon at the top right or select the device type to add the device
Step 3: On the “Scan QR Code” page, tap the edit icon at the top right, then enter the SN manually to add the device.
**Please make sure you have the correct device serial number and device verification code first!
How to add a new device in the EZVIZ App
1. Log in your EZVIZ App
2. Tap the “+” in the top right of the Home page to add a new device
3. It is recommended to scan the QR Code on the cover of this manual or on the body of the camera to add the device
4. You can also tap the icon in the top right of the Scan QR Code page and enter device SN (serial number) to add the device
5. Please noted that one device is only allowed to add under one account. Please make sure the device have been deleted from other account before you add it.
6. Follow the rest of the instructions in the app to finish
How does EZVIZ protect my video privacy?
1) Every EZVIZ device comes with a factory programmed verification code or Users have to set their own passwords. For privacy protection, unauthorized users cannot access videos, playback and images without a verification code.
2) EZVIZ adopts HTTPS in order to protect users’ connection to our website. Hypertext Transfer Protocol Secure (HTTPS) is a combination of the Hypertext Transfer Protocol with the SSL/TLS protocol to provide encryption and secure identification of the server.
3) EZVIZ uses end-to-end SSL/TLS encryption to prevent data interception and theft.
4) Only valid emails/phone numbers can be used to register EZVIZ account, EZVIZ implements email/phone number verification by sending verification codes to allow users complete critical account activities, like creating an account, retrieving lost password etc.
How to create IFTTT applets with EZVIZ cameras?
Click here to see the details.
This method is applied for the EZVIZ customers in the US and UK region. For other countries/regions, this feature might not be available
How to set up C6N/TY1/TY2 as a webcam?
Web camera On SplitCam
1 Download and install SplitCam software on your PC
2 Ensure your camera and your PC are on the same network
3 Right-click your mouse and click IP Camera, input the URL in Add IP Camera, and click Add:
rtsp://admin:verification code@device ip:554/ch1/main (mainstream)
Note: verification code is the 6 capital letters code you can find on the device label; device IP is the IP address of your camera.
What is the IR spectrum that EZVIZ uses?
The IR spectrum is 850nm.
How to use LAN Live View
If you want to use LAN Live View, you can enter it in the following two ways:
If your phone network is on the same local network as your camera
1 Log in to your EZVIZ account, and tap the profile icon on the top left corner.
2 Tap Settings
3 Scroll down to find LAN Live View
4 Alternatively, if you are unable to log in to your EZVIZ account, you can also access LAN Live View by tapping the play icon on the top right of the login page.
5 Make sure your camera and phone are on the same LAN, then tap Start Scanning.
6 Enter the device verification code as the password (usually located on the white sticker of your camera) and the username is admin by default, and you will be able to view your camera.
If you do not have a network
1 Log in to your EZVIZ account, and tap the profile icon on the upper left corner.
2 Tap Settings
3 Scroll down to find LAN Live View
4 Alternatively, if you are unable to log in to your EZVIZ account, you can also access to LAN Live View by tapping the play icon on the top right of the login page.
5 Reset the camera by pressing the reset button for 4-5 seconds and when the indicator light starts flashing blue quickly, go to the Wi-Fi settings page on your smartphone, connect your phone to the device Wi-Fi named EZVIZ_plus SN, and enter the password EZVIZ_plus verification code (the verification code is usually located on the white sticker of your camera), then go back to the EZVIZ app and tap Start Scanning.
6 Enter the device verification code as the password and the username is admin by default, and you will be able to view your camera.
Whether EZVIZ devices support ONVIF protocol
Currently, none of the EZVIZ cameras support ONVIF.
However, the following recorder models do support ONVIF:
– X5S/X5C
– NVR kits like X4 (if the firmware is up-to-date)
Why my camera keeps turning or rotating itself randomly
Please kindly note that if you enable smart tracking, the camera will start tracking when being triggered by the moving object. Then, when the tracking ends and it is not triggered for 30 seconds, the camera will rotate to the maximum degree and then return to the original position where the camera is triggered. This should be the reason why you would see the camera rotate itself from time to time.
If my Wi-Fi password changes, do I have to use the app to reconnect?
For this situation, you need to reconfigure the camera by following the steps below:
1. Press and hold the RESET button on your camera for about 5-10 seconds to reset it. This will allow you to start the process of reconnecting the device to the Wi-Fi.
2. Make sure your EZVIZ device is in Wi-Fi configuration mode.
3. Open the EZVIZ mobile app on your smartphone.
4. From the Home page of the app, tap the 3-dot icon next to the name of your camera to enter the Device Settings page.
5. Tap the “Wi-Fi” or “Network Settings>Wi-Fi”.
6. Follow the prompts and instructions in the EZVIZ mobile app to enter the new Wi-Fi password to connect your device to your Wi-Fi network again.
How to enable or disable device audio?
Go to the device settings page of the device you want to adjust settings, find and tap the ‘Audio’ toggle. Please note that if audio is disabled, there will be no audio for both live stream and video history.
How to enable or disable device IR light?
Go to the device settings page of the device you want to adjust settings, find and tap the ‘IR light’ toggle. Please note that if IR light is enabled, image quality will be better in the dark.
Why the device was unable to add successfully?
1. An incorrect password is the top reason why the setup fails. Always remember password is case-sensitive and ensure that you have entered it correctly.
2. Trying to set up the EZVIZ device while it is not in configuration mode is another common cause of setup failure. You can easily tell whether the camera is ready by checking whether the indicator light is flashing blue quickly or red and blue alternatively.
3. Ensure that when you configure the network, your EZVIZ device is close to your Wi-Fi router. We do suggest that you keep the distance shorter than 1.5 meters.
Whether EZVIZ devices support NAS
Please kindly note that EZVIZ devices do not support NAS, but you may use an SD card or subscribe to Cloud Storage (available in certain markets and be subscribed by going to camera settings>Cloud Storage>Subscribe) to store recordings. For a compatible SD card, please click here for reference.
How to restart device?
EZVIZ camera supports restarting devices when the camera is online. If your camera supports this feature, click “restart” in the settings page of the camera. Then the device will go offline for a while and will be online automatically afterwards.
What are the network requirements for device configuration?
1. Ensure that you have connected your mobile device to the correct band. For EZVIZ devices support 2.4G Wi-Fi only, you must connect your mobile phone to 2.4G Wi-Fi.
2. Ensure that your Wi-Fi network connection is good. Most EZVIZ devices perform better when the upload speed is greater than 2 Mbps for each camera.
3. Ensure that your Wi-Fi network signal is good. Try to avoid obstacles and interferences such as walls, elevators, microwaves, washing machines, and Bluetooth devices.
Can I use HB3/BC1 without base station
For HB3, please be informed that HB3 must be used with the HB3 base station. One base can connect up to 4 HB3 models.
For BC1, please be informed that BC1 must be used with the BC1 base station. One base can connect up to 4 BC1 models.
What are the phone settings requirements for device configuration?
1. Ensure that you have given Location permission to the EZVIZ App.
2. Ensure that you do not turn on the VPN.
3. For iOS mobile devices, ensure that “Local Network” settings are turned on.
How to place my EZVIZ solar panel
For best performance, you may follow the below to place your solar panel:
1 Please do not place the solar panel under shades and ensure it gets the most sunlight.
2 Please do not place the solar panel completely parallel to the ground to avoid dust or other dirt.
3 The solar panel should be tilted to receive maximum solar radiation and the recommended tilt angle is 25°-40°.
How many cameras can I link to W2H/W2HS
For W2H, it can link up to 4 BC1 cameras.
For W2HS, it can link up to 4 HB3 cameras.
[Troubleshoot] Why can’t I charge the battery camera?
1. Check the power source: Make sure the power outlet you’re using is working properly. You can also try plugging the camera into a different outlet.
2. Check the power cable: Make sure the power cable is not damaged or frayed. You may also try using a different charging cable to see if that solves the problem.
3. Reset the camera: If there is still remaining power in the camera, you can try resetting the camera by pressing and holding the reset button for about 10 seconds. This will typically restore the camera to its default settings and may help resolve any charging issues.


