Views: 5
DVR NVR Troubleshooting CCTV Systems, DVR NVR Troubleshooting All Manufacturers, DAHUA NVR TROUBLESHOOTING, Hello dear visitor, in this article we will present you the frequently encountered problems and solutions in DVR NVR and IP Camera security systems. We will explain it through the Dahua recorder, logically many systems are the same. Hikvision Dahua XMeye Uniview or other OEM systems generally work on the same logic.
P2P Troubleshoot
There are following possibilities:
• Check the network connections from NVR to your router.
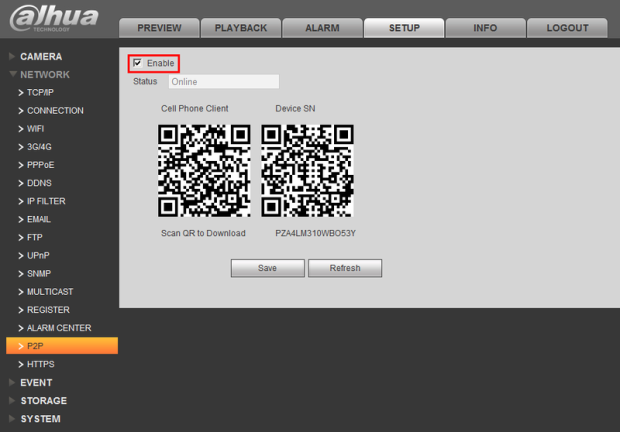
• Check the device P2P function is enabled or not. (Main menu*>Setting*>Network*>P2P)
• Check cell phone P2P login information is correct. You will need to ensure the user name and password are correct. (This is the credentials for logging into the system.)
• Check P2P SN is right or not. You can use the cell phone to scan the QR code on the device P2P interface (Main menu*>Setting*>Network*>P2P), or you can use the version information of the WEB to confirm. (For some previous series products, the device SN is the main board SN, it may result in error.)
Step by Step Instructions
1. Check that, “P2P is enabled under, Main Menu->Setup->Network->P2P
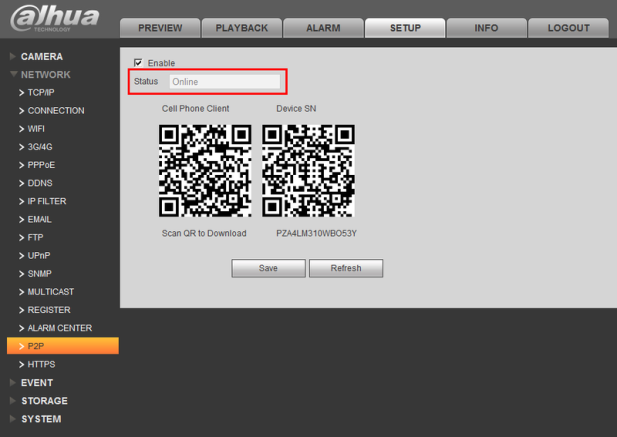
2. Check that the P2P status is, “Online”
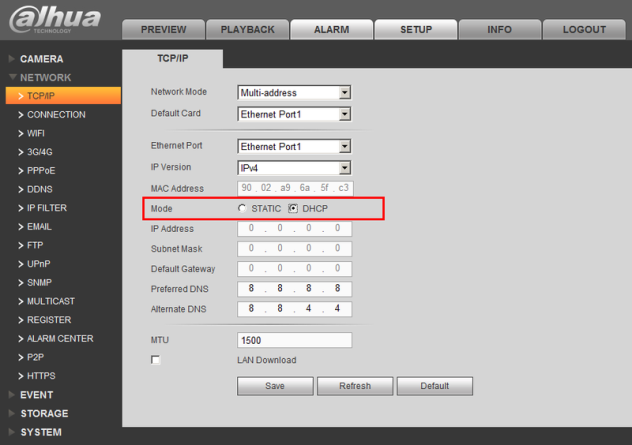
3. Enable DHCP under, Main Menu->Setup->Network
4. Reboot the NVR.
DVR NVR Troubleshooting CCTV Systems
Read Next : Video Loss Troubleshooting for DVRs NVRs
Browser Troubleshoot
Unable to Login from Web Browser
• For Windows 8 or 8.1 you make sure you IE Browser’s security setting are set to low for that IP address.
• Or you can install client-end software of lower version.
• It is possible that the ActiveX control has been disabled.
• No dx8.1 or higher. Please upgrade display card driver.
• Network setup or connection error.
• Password or user name is invalid.
Step by Step Instructions
1. Delete any previous version of Web Rec. How to Delete Web Rec
2. Make sure you are using Internet Explorer (Safari on OSX). Not Edge, Chrome, Firefox, or any other browser.
3. Configure Internet Explorer’s security settings. How to Configure Internet Explorer’s Security Settings
4. Ensure no Malware or Viruses are installed on the computer.
5. Set as a trusted site.
6. Change credentials from Recorder if credentials are invalid.
7. Close out IE and reboot PC.
8. If accessing outside of network, make sure device is set up for remote viewing such as DahuaDDNS or port forwarding.
9. Ensure you have ” http://” in front of the domain name or IP address.
• Eg. Locally http://170.16.17.116/
• Eg. Remote access with open port number if port number is applicable http://170.16.17.116:80
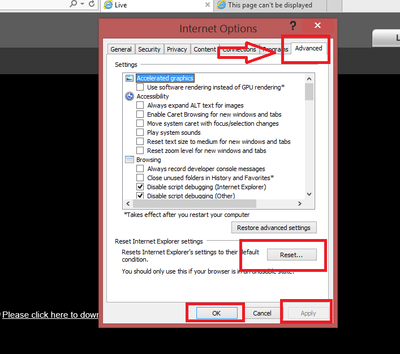
10. Set IE settings to default condition. Please see below.
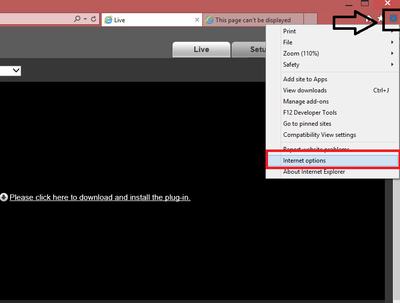
• Click on settings from the IE ➞ Click on “Internet Options”
• Click on the Advanced tab ➞ Click Reset ➞ Click Apply ➞ Click OK. You will have to reboot your PC for the changes made.
11. If none of the above will work, use SmartPSS.
Network connection is not stable.
Explanation:
• There maybe an IP address conflict.
• There maybe a MAC address conflict.
• PC or device network card is not good.
Solution:
• Check the cable connection from the system to the router/modem
• Your router or modem maybe failing and needs to be replaced.
• Check for DHCP and static IP address.
• Check MAC address.
The video is not fluid when I view in multiple-channel mode from the client-end.
• The network bandwidth is not sufficient. The multiple-channel monitor operation needs at least 100M or higher.
• Your PC resources are not sufficient. For 16-ch remote monitor operation, the PC shall have the following environment: Quad Core, 2G or higher memory, independent displayer, display card memory 256M or higher.
There is only mosaic no video when preview or playback video file remotely.
There are following possibilities:
• Network throughput is not good.
• The PC’s resources are limit.
• There is multiple-cast group setup in DVR. This mode can result in a mosaic video view. Usually we do not recommend this mode.
• There is privacy mask or channel protection setup.
• Current user has no right to monitor.
• DVR local video output quality is not good.
• Check out the Need More Recording Space Wiki article for more information on how to optimize a camera feed.
How to perform an internet speed test
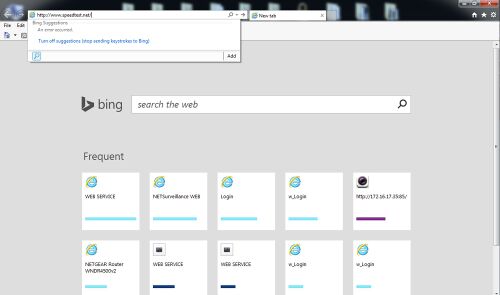
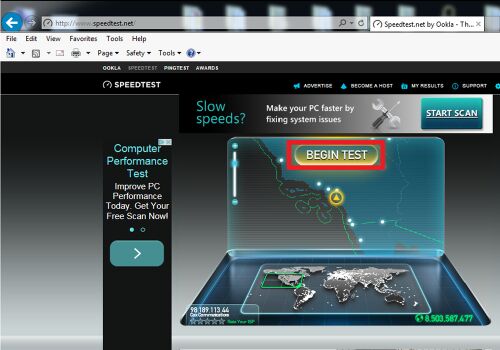
1. To check your Internet connection please go to http://www.speedtest.net/
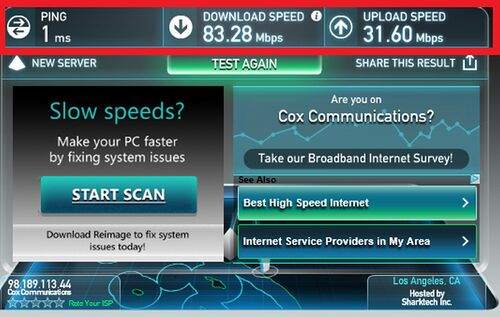
2. Click Begin test, and let the test run
3. Compare your results next to your required internet specifications for your device(s)
System Bandwidth
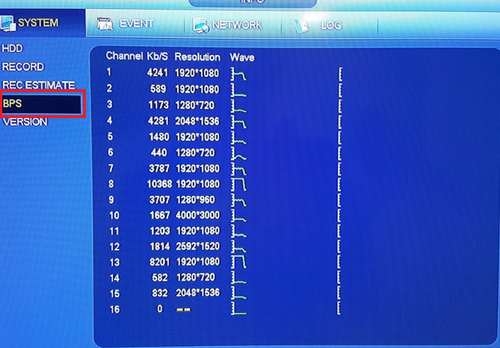
You can monitor how much bandwidth the system is using. You can do this by following the the steps below.
1. From the Main Menu under Info click on “System”.
2. Click on “BPS”. Here you can see how much data each camera is using.
How to create and install a certificate
When I login via HTTPS, a dialogue says the certificate for this website is for other address
You will need to re-issue a certificate with the correct address, and then get the certificate authenticated.
• Follow (Steps 1-5)
.
When I login via HTTPS, a dialogue says the certificate is not trusted
You will then need to download the certificate and install it on your client side.
• Follow (Steps 1-4 and 6-11)
When I login via HTTPS, a dialogue says the certificate has expired or is not valid yet
• Please make sure your PC time is the same as the device time.
• Follow (Steps 1-4 and 6-11)
• Re open the browser and login again.
.
Step by Step Instructions
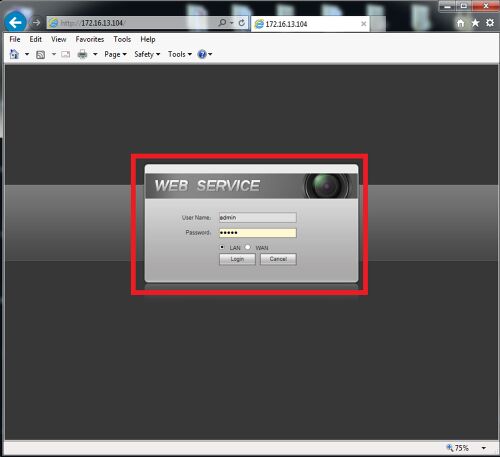
1. Log into your NVR via the Internet Explorer Browser.
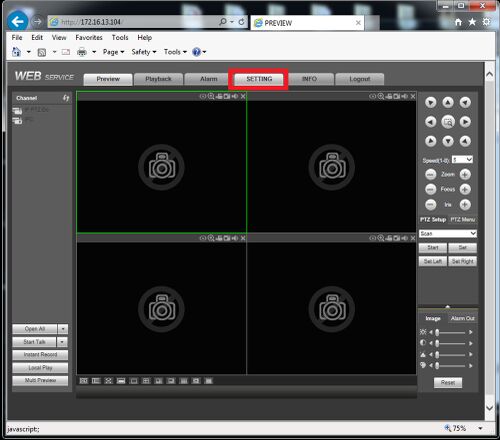
2. Select Setting
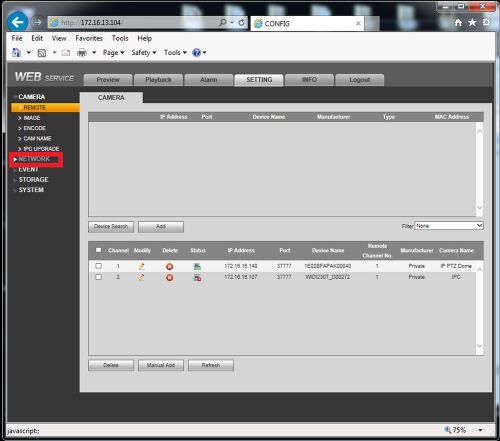
3. Select Network
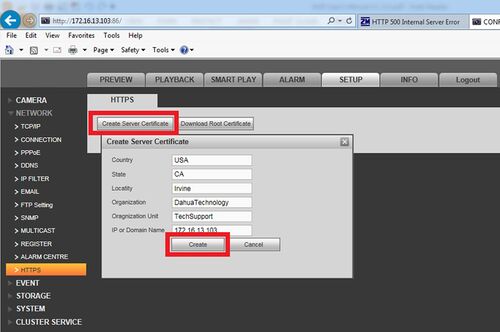
4. Select HTTPS on the left hand column under Network. Then select “Create Server Certificate”, and populate your server Certificate with your country code, state, location (city), the name of your organization or business, the name of the department, and the IP or domain name you wish to operate under. The information here will be used to create the SSL certificate to be authorized.
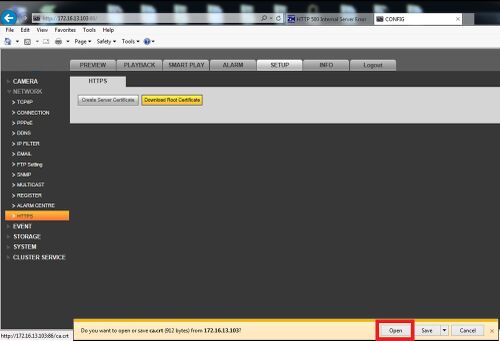
5. Now Select “download Root Certificate”, and click open when the prompt pops up on your browser.
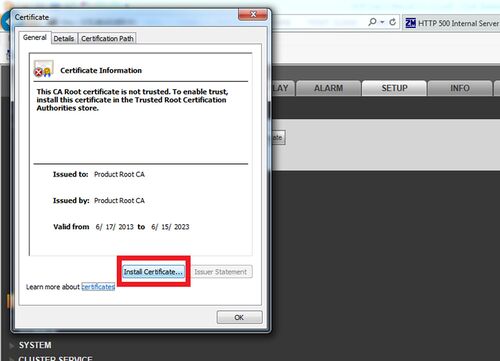
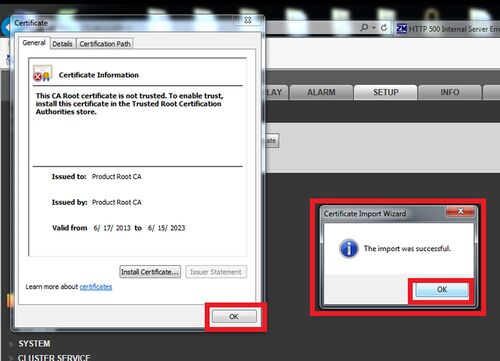
6. Click Install Certificate
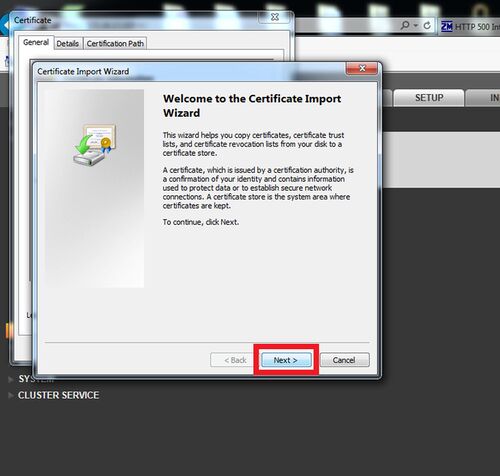
7. Now click next
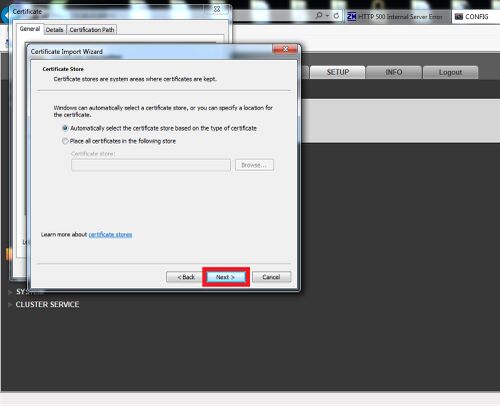
8. Now click next, unless there is a directory that you want to store the certificate in on your client computer
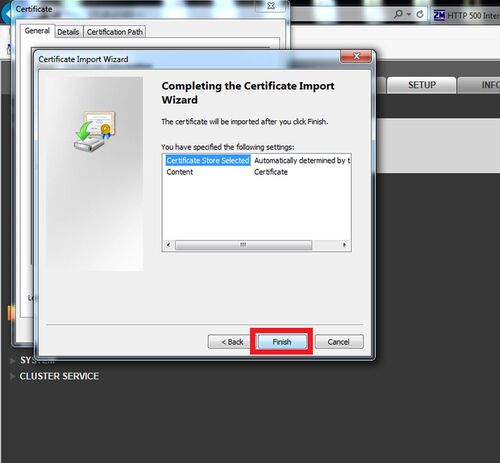
9.Now Click finish
10. There should be a prompt saying “The import was successful”
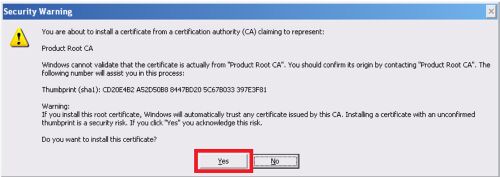
11. After the security certificate is installed go to your HTTPS page and there should be a security promp, click “Yes”.
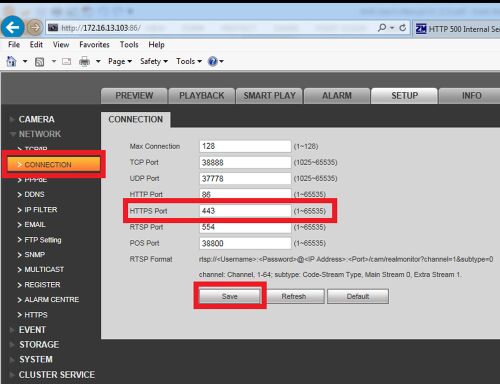
12. Pay attention to the HTTPS port number when setting up port forwarding for your host server (your NVR)
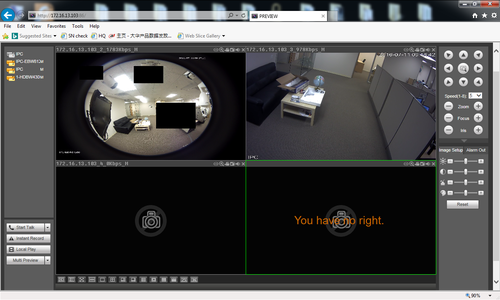
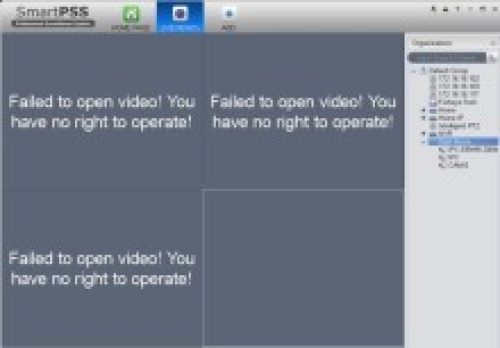
Failed to Open Video! You Have No Right To Operate!
Prerequisites
• Admin access to the recorder
• Access to the recorder directly or remotely
Video Instructions
Step by Step Instructions
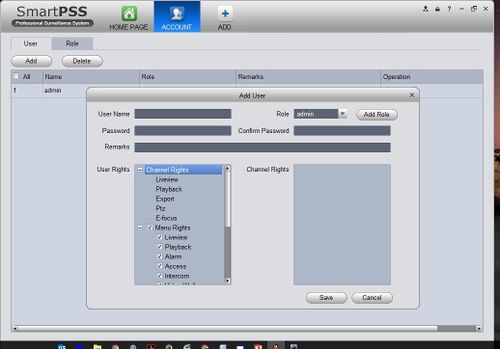
1. Log into with an administrator account.
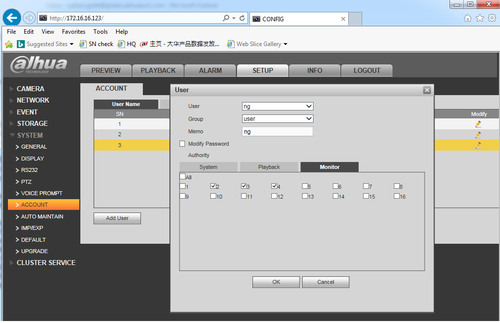
2. Go into the Accounts menu on your system and edit the specific profile you are having the error with.
3. Under the Monitor tab enable the camera channel with the error and click save.
4. Log into the modified account, and view the camera channel with the error.

